Sunday, January 29, 2012

Marbled Rice Krispies Treats

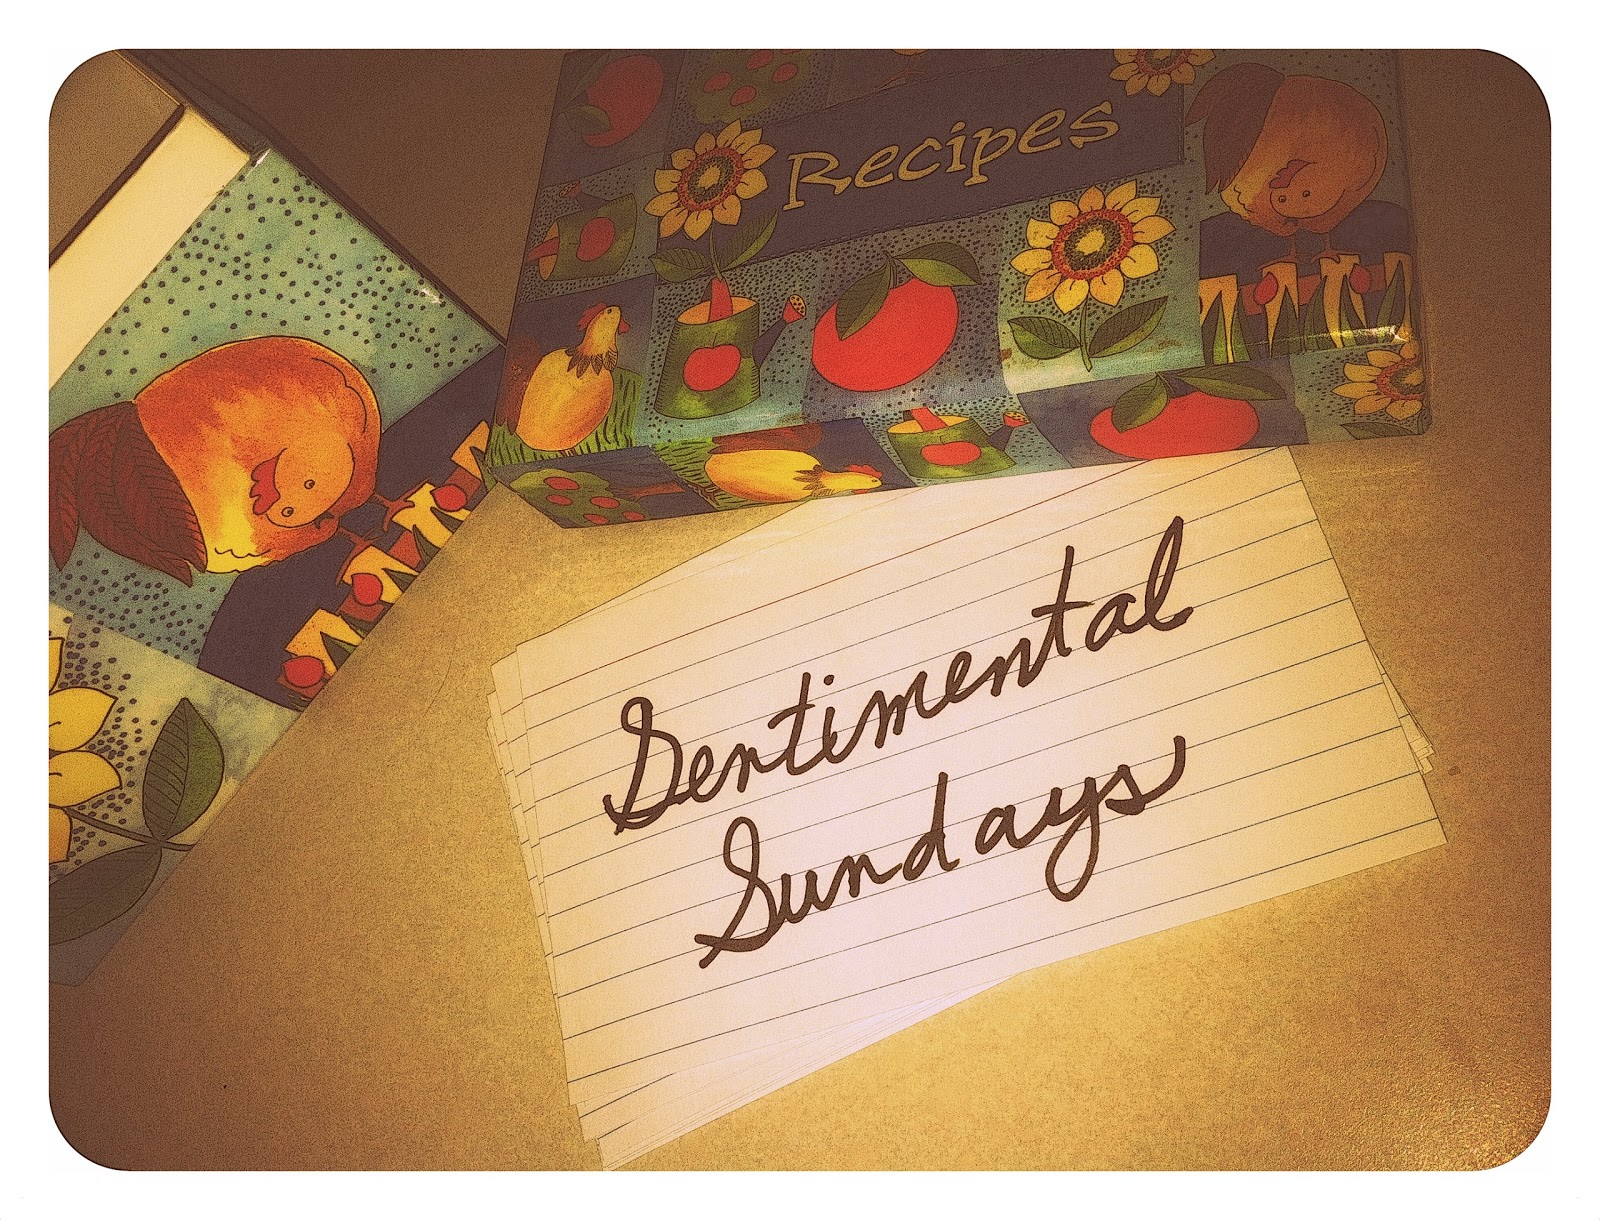
Yummy note: So for quite a while now, I've been telling my husband I really need to get some of my older recipes of mine merged onto my blog here. So as I mentioned in my blogiversary post, as part of a new year here at It's Yummy to My Tummy, I plan on doing this flashback feature, I guess you could call it, called Sentimental Sundays. Sentimental Sundays is a creation stemming from an old family site I used to update years ago, pre-blogger. I just kept basic recipes in text form, with an occasional picture of the finished product with it on the webpage. Nothing crazy, no prep photos, just the finished recipe. Many of the recipes I had entered in, came from an old recipe card, something I quickly threw together, a clipped article from a newspaper, family cookbook, or one of those handed down.. "that recipe used to be the church lady's or the neighbor lady's" - I think you get the picture ;-)   Anyways, I had input them online for keepsake, and now will be sharing them on here. Most of the Sentimental Sunday recipes I plan on posting do not have any author/copyright/original info on, so I always am a bit leery on that since I don't "really" know where it came from. So perhaps if something appears to be "just like" a recipe you know of that came from a cookbook you have, please let me know and I'd be happy to attribute it to it. So now the hard part, what is my first Sentimental Sunday going to be... 


Well, I decided to start with one of the first dessert recipes that I made and started to take pictures of :) I love desserts, so I thought that was a good starting point. This recipe is for Marbled Rice Krispies Treats. I recall making the regular standby Rice Krispies Treats one day and ran out of the regular Rice Krispies and all I had left was some Cocoa Krispies, so "marbled" was born. And then of course, I couldn't stop with that addition, I had to add in some colorful little candy


Marbled Rice Krispies Treats 


Ingredients:
3 tbsp butter or margarine
4 cups miniature marshmallows
3 cups Cocoa Krispies
3 cups regular Rice Krispies
1 1/2 cups mini m&m's or other mini chocolate coated candies
2 squares of baking chocolate or a chocolate candy bar


Directions: 
Melt butter and marshmallows until melted. Add cereals and mix together. Quickly stir in 1 cup of the mini chocolate candies. Press into 9x13 buttered pan. Melt chocolate bar or baking chocolate squares until melted. Drizzle over the Rice Krispies Treats and sprinkle the remaining 1/2 cup of candy over to finish.

Wednesday, January 25, 2012

happy 2nd blogiversary!

Yummy note: Wow, I can't believe it has been 2 years since I've been updating It's Yummy to My Tummy! So I guess I can say it's a Happy 2nd Blogiversary to me!  So much as changed since the first recipe posting of the Kahlua Cheesecake Brownies!


As I was looking back at previous posts, I realized that I didn't even send out a happy 1st blogiversary last year. Then I realized.. oh, I was a bit out of commission then. I was on bedrest, about 37 weeks pregnant and in a bit lost in a flurry of activity. I thought I'd check to see what I was baking or doing on that day though and post what I found... how fun.. Alicia and I were making homemade pizza!


Just a few days later, I was here.. Luckily, nice and safe in the hospital with my newest little one, Ben, while one of the biggest snowstorms had just hit the midwest area.


Months later, here's my family and the kids getting so big, enjoying one of our favorite times of year, fall.

Looking at the various foods of the last year, it has been a busy year of trying new things and sharing a few staples. A few of the top hitting and searched recipes from my site this year were: cake popsgranola bars, carmalized chickpeas, lemon loaf, and apple bellinis. Some of my personal favorites (because Alicia was a big help in these and she enjoyed them just as much as I did) to do probably were the April Fool's Day sushi, homemade noodles, and yummy mummy dogs


So now, what kind of fun are we going to do in the next year?! Well, I hope to do a few new things with my blog such as once a month, I want to feature a recipe from a real cookbook, not internet-based or recipes handed down to me, but an actual book, as sometimes I forget that this is where much of my cooking started! I also plan on featuring a series of posts called Sentimental Sundays. Sentimental Sundays will like flashbacks of some of the old stand by recipes that I have in my collection that we love. They might be more on the simple side, and not be as in-depth as some recipes, but they'll be featured and probably more on the traditional side. Never fear, I still plan on participating in the Secret Recipe Club, cooking challenges, and parties, so that will not change, I'm just adding in a pinch or so of more fun to the party!


Last, thank you to all of my followers, readers, and visitors to It's Yummy to My Tummy and allowing me to share all of my wonderful baking and cooking experiments and adventures with you all. It has been fun getting familiar "faces" around the site and I LOVE to see your comments. It makes me realize people are really out there reading my blog and makes this adventure all worth it...

Saturday, January 21, 2012

Pumpkin Scones

Yummy note: This year, I had made some homemade hot cocoa in a jar to give to a few girlfriends, and I wanted something tasty to go along with that for them to enjoy. I thought, what would be delicious with a cup of cocoa.. shortbread, muffins, cookies, or wait.. it hit me, a scone! I mean that was my favorite coffee shop treat when I go. Hello, a Starbucks' like pumpkin scone would hit the spot perfect! A scone also would hold up and taste nice even if I wrapped it up a day ahead of time. Actually this pumpkin scone recipe held up for about 4-5 days before they started to loose their excitement and started to go on the dry side. So I went searching for that perfect Starbucks copycat recipe as I had tried making up a scone recipe before, and well they ended up a little too dry. So no time to play around, I wanted the close to the real deal as I could. And I found this fun little site called Lattes and Life and decided that was the one, since Tiffany had blogged about these pumpkin scones, not once, but twice on her blog, so they must be good, right?! And the verdict.. Guilty, indeed, some wonderfully flavorful pumpkin scones. My dear friends that were lucky enough to get some scones, here is the "famous" recipe that I spoke of... :) I hope you take some time and bake and enjoy another batch.

Pumpkin Scones 
(like those from Starbucks but better since they are made with more love :) 


Ingredients: 
For the Scones:
2 cups all-purpose flour
7 tbsp sugar
1 tbsp baking powder
1/2 tsp salt
1/2 tsp cinnamon
1/2 tsp nutmeg
1/4 tsp cloves
1/4 tsp ginger
1/2 cup pumpkin puree (or canned pumpkin)
3 tbsp half and half
1 egg
6 tbsp cold butter (cut into slices/cubes)

For Plain Frosting:
1 cup plus 1 tbsp powdered sugar
2 tbsp milk

For Spiced Glaze:
1 cup plus 3 tbsp powdered sugar
2 tbsp milk
1/4 tsp cinnamon
1/8 tsp nutmeg
pinch of ginger
pinch of cloves


Directions: 
Preheat oven to 425 degrees. Stir together flour, sugar, baking powder, salt, and spices in a large bowl. Place dry ingredients and cold butter in a food processor. If you don't have a food processor, just cut in the butter with forks, as if you were making a pie crust, continue to cut in the butter until the texture starts to look a bit like cornmeal. In another bowl, mix together pumpkin, half and half, and egg with a whisk.


Fold in wet ingredients into the dry ingredients and form a ball.

Place dough onto a lightly floured surface and form into a rectangle or a circle also works ok. Just make sure the dough is about 1 inch thick and begin cutting wedges.


Bake scones for about 14-16 minutes on parchment paper or a silicon mat, until they appear done. Let them cool completely before frosting them.


For the plain frosting, mix powdered sugar and milk until smooth. Spoon onto scones and let it set up before drizzling on the spiced glaze. For the spiced glaze, mix powdered sugar, milk, and spices until all ingredients are incorporated. This will be thicker than the plain glaze. If you need to adjust consistency of the glazes, just add in more powdered sugar or milk until you achieve your frosting zen. Haha, do what you like though, I like the thicker frosting, so I went a touch on the heavier side of both, it makes for a prettier set up, plus who doesn't love more frosting??


Back to the spiced glaze, drizzle over white frosted scones. The scones are less messy to eat once the frosting has set up a bit, but hey, I'm not watching so, go ahead and enjoy it as you wish :)

Tuesday, January 17, 2012

Baby Amuse-Bouche Game

Yummy note: So every so often, I post a weird recipe. Well, this is it. Do you have a baby shower you need to throw AND coordinate games?!  Yipes! Well, look no further, I'm here to help you with a fun game. I know it is one of the legendary disgusting games people DON'T want to play at baby showers, right up there with the dirty diaper game.. yes, you know- this one, yuck. Well, why not make a game better, yet actually fun to taste! You can use my basic baby food recipes here and begin creating fun flavors. If you'd like more ideas or recipes, leave me a comment and I'll gladly send you an email with some ideas! 


Baby Amuse-Bouche:
A baby shower game


Directions: 
I've made a wide variety of baby foods the last few months. For a friend's baby shower, we showcased some of Ben's food by doing a Baby Amuse-Bouche game. Participants had to taste one baby spoonful of the different purees and match it up to the correct flavor. Fun times, and a little less disgusting than some of the jarred varieties when you play that game! It turned out fun, as guests actually tasted the variety of purees instead of just passing it around sniffing the plate, haha. :) Basically, you need to give each guest,  a paper plate, spoon, pencil, and answer sheet/list. Have them write numbers on their plate around the edge; for example, if you have 8 types of food, then have them mark their plates with numbers 1-8. Then place a spoon full of each food next to the coordinating numbers. Have the guests taste the food and guess what the flavor is and mark it on their answer sheet. The guest with the most correct answers wins! You may want to have one or two more flavors (perhaps an even harder to determine flavor) set aside for a tie-breaker taste-test if needed. Enjoy! 

Wednesday, January 11, 2012

basic baby food purees

Yummy note: Being a new mommy all over again, I decided to be a bit braver than what I was with my first. Once little Ben got the green light from the pediatrician to start trying fruits and veggies, I decided to jump right in. I found out that it is cheaper and tastier than that jarred baby food out there. Even if you use organic fruits and vegetables, it is still cheaper than already prepared baby food. It does take a few minutes of your time to prepare, but really you can make several batches of different foods for your baby in just an hour. So cook for a few hours one day a month and get a bunch of frozen little baby meals!  Ice cube trays work wonderful for easy portions, so if you don't have special baby food containers, it's ok. The containers and trays I used were about 1 ounce each, so it worked well for freezing little pods of food. Then when it comes to defrosting it, it goes pretty quick since it is a small amount. If you can't find quality fresh veggies or fruit, don't worry the frozen counterpart is healthy too.  I found out that these little frozen steamer bags of veggies or even fruit work great for this. When starting out, I found this handy website that I've referred to a number of times for ideas, and also talking with our pediatrician if particular foods were ok to experiment with.  http://wholesomebabyfood.momtastic.com

Basic Baby Food - Fruit and Veggie Purees


Peach Banana Puree 


I always have ripe bananas to use up, so this was a nice way to save those browning bananas. Plain banana puree freezes  and tastes ok, but it looks a bit brown, so incorporate those bananas with other fruit to avoid browning. 


Ingredients:
1 bag of frozen peaches 
1 ripe banana 
* optional - water or apple juice 

Directions: 
Place frozen peach slices in steamer bag and steam in microwave for about 3-4 minutes or until fruit becomes tender. You could also place frozen peaches in a steamer basket and steam in a pan of boiling water on the stove. (Do whatever you are more comfortable with, but we careful to not scorch or let your pan go dry, or else it will burn... yeah...did this, as I wasn't able to keep close eye on it and yuck, had to throw out an entire batch of food since it was nasty gross.) Once peaches are cooked and tender, begin to puree the fruit.* Add in cut up banana and puree until desire texture for baby is achieved. May need to add in a little bit of water from steaming liquid or apple juice to achieve thickness consistency. Pour into 1-2 ounce containers for either storage in the freezer or refrigerator. Can store for 2-3 days in the refrigerator or for about a month or so in the freezer.    


Apple Strawberry (Banana) Puree 


This is one of our favorites to make. My husband and I liked it when we taste tested Ben's batch, that we have since made larger batches for us to enjoy too! Always taste test your baby's homemade food.
Ingredients:
1-2 apples, peeled, cored and chopped
couple of ripe strawberries, hulled
* optional apple juice or water
* optional - 1 ripe banana

Directions: 
Put the chopped apple into a saucepan with couple tablespoons of apple juice. Cover and simmer for 5-10 minutes or until tender. Add the strawberries and cook for another 2 to 3 minutes. Let mixture cool and begin to puree. *Optional: Add in your cut up banana. Blend until smooth or desired texture is achieved and pour into storage containers for freezer or refrigerator.


Basic Veggie Puree

Ben didn't care for the peas straight, so when I mixed some apples and carrots in it, he was better receptive of eating his peas! 

Ingredients:
1 bag of frozen peas
Couple of carrots, peeled and chopped up
1 apple

Directions:
Steam veggies and fruit whichever method you prefer, either on the stove or microwave. Once tender, puree fruits and veggies together.* May need to add a little bit of the water from steaming the vegetables to achieve consistency you'd like. Pour into 1-2 ounce containers for either storage in the freezer or refrigerator. Can store for 2-3 days in the refrigerator or for about a month or so in the freezer.  


*Options for the puree method: You can do that with a blender, food processor, food mill, or a Baby (Magic) Bullet machine. If making double or larger batches of food, a food processor works well, but it you are only making a smaller batch, a blender does fine.  

***Final Yummy note: Some various flavors/ingredients I've made have included: carrot, carrot/parsnip, sweet potato, squash, pumpkin/squash, avocado/banana, banana/strawberry, green beans, peas, apples, pears, beef stew, beef and noodles, chicken and rice, sweet potato/apple, apple/squash, and many others. Just have fun and experiment with your baby's variety of food and enjoy mixing up a batch!  Please discuss any concerns of food allergies and what your baby's feeding schedule is with your pediatrician before giving your baby any solid foods. Once your baby is ready for various foods, gradually incorporate into their diet then to make sure there are no allergic reactions.

This recipe post is shared with these other blogger's parties! Make Ahead Meals for Busy Moms, These Chicks Cooked, Whole New Mom, The Better Mom, Polka Dots on Parade, From Mess Hall to Bistro - Made from Scratch, Allergy Free Cooking, and The Lady Behind the Curtain

Saturday, January 7, 2012

chicken noodle soup with fun-shaped noodles

Yummy note: The chicken noodle soup challenge... boy it sure was. I had been searching high and low for that perfect soup. Honestly, I went searching for a soup that looked good from a picture, rather than looking through the ingredients first. haha, I work that way, you know if it looks good, it must taste good, right? :) When I saw a picture on Iowa Girl Eats blog, I KNEW that was the one. I mean take a look yourself at this picture, makes you want to make a batch of chicken noodle soup right now, doesn't it? So this challenge by Tina at Mom's Crazy Cooking said it "must have chicken and noodles and must be a soup" - so I looked no further and knew I wanted this recipe and didn't even really want to change a thing. This recipe from Kristin at Iowa Girl Eats blog was so up my alley; I went to college in Iowa, my husband's family lives in Iowa, and well, we visit there quite a bit, so when that picture said "welcome home" - it was it. What a great blogger fit for me, really, this recipe rocked at how simple and tasty it was. I am now a big fan of Iowa Girl Eats and her awesome recipes!  :) The only thing I did different with Kristin's recipe was to add in a touch of mommy love, as the kiddo and I made a half a batch of fun-shaped egg noodles to throw in. We made the soup on a gloomy, cool morning, so adding a little fun touch made everyone feel a little better. Really, it is the little things that makes a day better...


Chicken Noodle Soup with Fun-Shaped Noodles 


Ingredients:
1 tbsp butter
2 tsp olive oil
1/4 of an onion, finely chopped
1 large carrot (or 10 mini carrots), sliced
1 stick of celery, chopped
salt and pepper
2 garlic cloves, minced
2 cooked chicken breasts, shredded or cubed
46 oz chicken broth
8 oz frozen egg noodles*
Directions:
Melt butter and olive oil in a large sauce pan and then toss in onions, carrots, celery, salt and pepper. Cook for about 10 minutes or so until veggies are tender, or add in a couple tablespoons of broth and put a lid on the veggies and let them sweat it out a bit. Just stir halfway through so they don't stick on the pan.


Then add in the minced garlic and saute for about a minute or so, before adding in your chicken and broth. Bring the soup to a boil, and add in your egg noodles and simmer for about 20 minutes or so, or until your noodles are tender.


*Yummy note: We made a small half batch of homemade egg noodles shaped like flowers to add into this soup for a whimsical touch. The key to my recipe for egg noodles is to roll your pasta dough fairly thin so the noodles don't get too thick and gummy. After rolling the dough out, use little mini cookie cutters and create some fun shapes! Make your own chicken and stars soup! 


If you liked my chicken noodle recipe with those oh, so cute fun-shaped noodles, go ahead and click LIKE on the link below next to my soup picture!  Hope you enjoy browsing around at all of the other great Crazy Cooking Challenge bloggers below. 


Photobucket

Wednesday, January 4, 2012

homemade egg noddles

Yummy note: While doing some blog organizing, I can't believe I haven't posted this recipe yet! Yikes! I love this simple, down home egg noddle recipe. It is an old family favorite, usually served with canned beef by my Aunt Vera. My mom's sister has been serving this for as long as I can remember, and we just love it. Out of town family members always ask for Vera's homemade canned beef and noodles when there is a gathering, so you know it is a keeper recipe! :) Over the summer before school started my daughter, my mom, and I stopped by my aunt Vera and uncle Eric's house just to make noodles! I don't think I've helped make noodles with my aunt in many many years, definitely grade school days probably when I used to go to their farm and hang out there in the summer time. So making this recipe with my little one was a big treat to share. We had such a great time, that Alicia enjoys making them with me every so often for a treat. Usually my aunt makes these noodles from memory so forgive me if these ingredient portions aren't just exact, but I've tried to measure it out in the numerous times I've made it since our trip that day. I think it makes roughly a pound of dry pasta. Either way, enjoy this basic egg noodle recipe that really hits home.


Homemade Egg Noodles

Ingredients:
1 whole egg
3 egg yolks
a pinch or so of salt (about 1 tsp) 
give or take about 2 cups flour
may need to add a teaspoon or so of water later

Directions:
Separate 3 eggs. Keep the egg yolks in a bowl, and reserve your egg whites for another recipe. :) Add in another whole egg into the egg yolks. With a mixer or a whisk, beat the eggs well. Should look a little foamy. Next add in pinch of salt, and start add in your flour. Add in flour, a half of a cup at a time. Stir mixture until well incorporated, once it appears to be coming together, use your hands to tell if the texture of the dough is correct. You want it not sticky and a bit smooth. So if it is too wet, add a little more flour, and then if it feels too dry and crackly, add a little water. Next place the dough on a lightly floured surface and knead the dough a bit until it is a fairly consistent texture in the dough. Then begin to roll out the dough with a rolling pin until about a 1/4 inch thick or thinner. Then run your noddles through your pasta machine according to directions. You may want to over your dough with a damp towel between batches of noodles.


Let noodles air dry for later use or toss into soup or other dishes for a yummy meal. If you are making noodles for later, place dried noodles in a freezer bag and freeze for later use. For super simple dish, toss noddles in a pot of boiling salted water and boil for about 5 minutes. It is a very quick cooking noodle, so it shouldn't be too mushy when cooked. Cook to al dente and serve with a little butter and herbs and call it lunch. :) 

Aunt Vera and Alicia using the pasta machine to make egg noodles!

Yummy note: My Aunt Vera just rolls the dough very thin and cuts them my hand with a sharp knife. So if you don't have a noodle maker, don't worry, using a rolling pin and knife is just perfect. This was the first time actually that my aunt used a pasta machine which was a treat for her! Cutting them by hand, may take a bit longer, but it works fine, as you just need to roll out the dough thinner. So don't rule out making homemade pasta because you don't have a machine! 

Recipe linked up to A Little Nosh and Lady Behind the Curtain recipe parties!