Monday, October 17, 2011

Spaghetti Fritata

Yummy note:  So the secret recipe fairies sent me a new challenge this month, that was to cook something meatless! Our family loves meat, so this was a tricky one! My secret blog for this month's Secret Recipe Club was Kristi from Veggie Converter. What a great site to get ideas for vegetarian or vegan meals! Her site is chalked full of recipes, as Kristi has a New Year's Resolution of cooking meatless every day for an entire year. Woah! What an inspiration to keep up with such a daunting task, but it looks like she has been going strong, so way to keep up the great work, Kristi. Also, she has a great little link here with vegan options if you need a little help. So after narrowing it down to about four dishes... the chili, the zucchini fritters, or the breakfast cups,  I opted for the spaghetti frittata! I made just a few minor changes, and ended up with a delicious crunchy, flavorful, spaghetti frittata. I added some sun-dried tomatoes into the mix, and tossed in some leftover cooked spinach I had, and wow, it made a hearty dish satisfying for all. And what a great recipe! What I loved about this recipe is that it was easy, fast, and great for leftovers! You can easily throw this together in minutes if you have some spaghetti and spinach already in your refrigerator. So why don't you take the challenge and make something vegetarian or vegan today!


Spaghetti Frittata 
Adapted recipe from Veggie Converter

Ingredients:
1/4 cup sun-dried tomatoes, diced
1/4 cup cooked spinach, chopped
2 cups cooked spaghetti noodles (about 1/4-1/2 lb of dry spaghetti noodles)
1/4 cup mozzarella/parmesan cheese mixture
1 large egg, beaten (may need an additional egg if mixture seems too dry)
handful or so of french fried onions
1 tsp dried parsley
couple tablespoons olive oil for frying
salt and pepper or additional Italian seasonings to taste


Directions:
Prepare your noodles, if you are making them right away, sure they are rinsed and drained. In a large bowl, toss together spaghetti, sun-dried tomatoes, about half of your cheese, parsley, and spinach. Next stir in beaten egg and coat ingredients until thoroughly incorporated. At this point, you may want to add in an additional egg, if you think your pasta is not coated well. If all depends on your preference. Next, coat an oven-safe pan with a few tablespoons of olive oil and and toss in noodle mixture. Slightly pat down and spread it out in your pan and begin to fry over medium heat.


Continue frying in fry pan, until the bottom begins to crisp up, probably about 5-7 minutes.


Next top with remaining cheese mixture and a handful of french fried onions. Place your oven-safe fry pan into the broiler and watch the magic happen. :)  The top begins to brown up nicely and the fried onions get crispy. This takes just a few minutes, maybe 5 minutes top to finish. Be careful not to burn your fried onions, so keep a close watch on it. Cut into pieces and enjoy.


For more information or to participate in the Secret Recipe Club, please visit our group's website at http://secretrecipeclub.com/

Wednesday, October 12, 2011

Toad in a Hole

Yummy note: Growing up I would often make these "toad in a holes" - these little egg-toasted-cheese like sandwiches for a quick meal or snack even. It was typically something that we always had the ingredients on hand to use. I mean what can be more of a basic kitchen staple- you have your bread, butter, and eggs. (The cheese is an optional add on.) So what is this "toad in a hole" you ask? It's the delicious buttery cross between my ultimate comfort food of a grilled cheese mixed with breakfast twist. This meal even got the "it's yummy" dance by my picky little 5 year old! Wohoo! However, she proclaims to name it a "bear in the cave" since we used a teddy bear cookie cutter the one day. Bear, toad, frog, whatever you want to call it, it is old school comfort food, not to mention affordable. Plus you can eat it any time of the day! Just the other day, I happened to finally catch up on my dvr recorded episodes of the Pioneer Woman Ree Drummond and saw she actually featured an "egg in a hole" too!! How cool is that, check out her version here for more inspiration to make your own...


Toad in a Hole


Ingredients:
a couple tablespoons of butter
a piece of bread
an egg
a slice of cheese


Directions:
Melt some butter in a non-stick pan over low heat. Then using a cookie cutter cut a shape from the center of the bread slice. Place bread in the pan and fry until lightly toasted. Add a bit more butter if you need, and flip bread over to do the other side. Next crack an egg into the hole in the bread. Either crack the yolk and mix egg a bit to make a scrambled egg inside the bread, or prepare egg as a sunny-side up (or over easy) egg. Either way, cook egg to your liking. While egg is cooking, add the inside bread piece in the pan and toast up as well; again you may need to add additional butter to the pan to finish frying. The bread should be nice and crunchy toasty when ready to eat. Season with salt and pepper to taste. Last, lay a slice of cheese on the egg and top with the inside piece of bread and enjoy.

This post is shared with These Chicks Cooked, Cast Party Wednesday, What's on Your Plate?, and Let's Do Brunch.

Friday, October 7, 2011

Crinkly Chocolate Chip Cookies

Yummy note: The other day, I was in need of making a little thank you gift for my neighbor. My neighbor graciously watched my kids one morning in a short notice, as I had to go into the office and attend a training meeting for a new project am working on. Thankfully, she was available and the kids were behaved, which was an added bonus! So I wanted something that Alicia could help me bake for her, since she enjoys helping so much in the kitchen, and cookies came to mind. Plus, cookies are the perfect gift to easily hide in our neighbors mailbox for a fun surprise! It seemed to be great timing to try out this new chocolate chip cookie recipe I found for this and for this month's Crazy Cooking Challenge*. Honestly, I can't recall how I found my recipe but I've had it bookmarked for some time now. It was on this blog named Short Stop. Short Stop is authored by a lady named Sarah. Sarah seems to love this cookie recipe as I've seen it featured numerous times on her site, ranging from cookie bars, cookie cups, mini cookies,etc. and it kept tracing back to her one recipe--- Mom's Chocolate Chip Cookies. So I had a feeling this was one awesome cookie recipe, and boy, was she right! It turned out great, we got gorgeous cookies. The cookies had just enough golden hard crinkles on the outside, while it was still a tad chewy and firm  enough inside to hold up those cookie cracks without it falling apart. yum, yum, yum. I really do love those pillow-like cookies with crinkles in them.      

Photobucket*The Crazy Cooking Challenge? What is it you ask? Another hostess blogger, Tina from Mom's Crazy Cooking, came up with this thing called the Crazy Cooking Challenge! Tina hosts fun blogging parties to showcase one specific kind of recipe each month, and this time is chocolate chip cookies! Check out all the others as well below. 


Crinkly Chocolate Chip Cookies
Original recipe found here.

Ingredients:
2/3 cup butter, softened
2/3 cup shortening
1 cup sugar
1 cup brown sugar
2 eggs
2 teaspoons vanilla
3 1/4 cups flour
1 teaspoon baking soda
1 teaspoon salt
6-12 ounces chocolate chips (depends on how chocolaty chip you'd like it to be, we used about a whole bag)

Directions:
Cream butter, shortening, and the two sugars together. Add in eggs and vanilla and stir until combined. Gradually add in the flour a cup or so at a time. Then add in the baking soda and salt with the last cup of flour and stir well. Finish it by adding in the chocolate chips. Roll into balls (or use an ice cream scooper) and place on cookie sheet. Bake in a preheated 375 degree oven for about 8 minutes or so depending on the size. Remove from oven when cookie begins to get slightly golden brown on the edges. 


Special thank you cookie gift baggie ready for delivery!
Yummy note: We enjoyed these cookies so much, another batch was made to tuck away into the freezer to bake some more at a later time when we wanted to enjoy warm cookies without a big fuss!

Thursday, September 29, 2011

Chicken Apple Gouda Wraps

Yummy note: So I'm back in the kitchen playing again with some delicious apples, but this time I used in an entree!  Kitchen PLAY and The US Apple Association is hosting this wonderful contest, and if your recipe is selected, you can win $100! How exciting is that?! It is a win-win for everyone! Kate at Savour Fare had a big mouthwatering sub-like looking sandwich that called my name, I am a sucker for pulled meat, smothered in a sauce.  So I decided to take a stab and recreate a slightly modified version of her Apple Cider Pulled Chicken Sandwiches with Apple Slaw. I have created a chicken apple gouda wrap in hopes I could create a lighter, not to mention quick entree using store prepared chicken. I made my entree using a healthier wheat tortilla shell, and went with a warm apple slaw instead of using a slaw with mayo. This was a pretty quick and no fuss recipe, that can easily be done for a mid-week meal.


Chicken Apple Gouda Wraps
adapted from http://savour-fare.com/2011/09/06/apple-cider-pulled-chicken-sandwiches-with-apple-slaw-sponsored-post/

Ingredients:

For the chicken:
1 rotisserie chicken, shredded (such a timesaver, just pick up an already prepared chicken from the deli and remove meat from the bones and shred)
about 1 cup apple cider
3 tablespoons apple cider vinegar
1/2 c. ketchup
1 tablespoon mustard
2 tablespoons brown sugar
salt and pepper to season
1/2 tsp seasoning salt
couple of dashes of Worcestershire sauce

For the apple slaw:
one bag of broccoli slaw (not a huge cabbage slaw fan, so I used this instead for a nice crunch)
small onion, sliced or diced
2 tablespoons butter
2 apples, thinly sliced
1/4 cup apple cider
Dash of Cider vinegar
Salt, to taste

Finishing touches:
1 apple thinly sliced
wheat tortillas
1/4 cup Gouda cheese

Directions:
Start by pulling off the meat from the already prepared chicken. Set the shredded chicken aside. In a medium saucepan, add in apple cider, vinegar, ketchup, mustard, brown sugar, and a couple of dashes of Worcestershire sauce. Stir all ingredients together and cook over medium heat until the sauce begins to bubble a little. Next add in your shredded chicken and seasonings to the saucepan and stir together. While this simmers together, start preparing your apple slaw. In a small saucepan, cook onion and butter together until onion becomes translucent. Then dump in the broccoli slaw mixture, sliced apples, and apple cider into the saucepan with your onions. Add in a dash of apple cider vinegar and add salt if desired, to taste. Cook slaw mixture just until it starts to get tender, then remove from the heat so that you still have some crunch left in the slaw. This really only takes just a few minutes for it all to pull together. Once your apple cider barbecue sauce is thoroughly mixed up with the chicken, get your ingredients ready to assemble the wraps!

Start with a slightly warmed wheat tortilla shell and begin layering on the goodness.. add some shredded chicken, then some of your warm apple slaw, and top with some chopped up gouda cheese, and finished with a few more crisp apple slices for additional crunch and flavor. And it's a wrap!! Cut in half and enjoy all of those wonderful flavors layered together.


Join the fun and enter this month's Kitchen Play Progressive Party by September 30 and blog about your favorite dish!

Wednesday, September 28, 2011

apple bellini

Yummy note: I came across this cool website other day called Kitchen PLAY which is hosting a contest featuring apples! The US Apple Association is sponsoring a giveaway at Kitchen PLAY this month where you need to recreate a recipe from this month's Progressive Party and then blog about it. Brooke from Cheeky Kitchen showed off her Apple Mojito cocktail in which I took a turn at recreated my own apple bellini cocktail. If you want to join the fun, do so before September 30th, and you can enter the Kitchen Play Progressive Party for your very own chance to win!

Apple Bellini (or Sparkly Apple Drink)

Ingredients:
about 2-3 apples to make an apple puree (or you may substitute using a prepared unsweetened applesauce)
1 bottle of sparkling wine, apple cranberry juice, cider, or champagne
couple of cinnamon sticks and thinly sliced apple slices for garnish

Directions:
Create an apple puree by cooking some peeled, chopped apples with a few tablespoons of water in a saucepan until the apples are tender. Roughly about 10 minutes, stirring occasionally until fully cooked. Remove from heat, cool, and puree apples. Yummy note: For some extra fun, I took some of the apple puree and froze it so that it could be used in the drink as ice cubes.

Next, prepare your apple bellini or using 1 part apple puree and about 2 parts champagne or sparkling wine. To make a non-alcoholic sparkly apple drink, just substitute the champagne with a sparkling apple-cranberry juice or cider! Stir together and top with apple wedge and cinnamon stick garnish. Enjoy!


Thursday, September 22, 2011

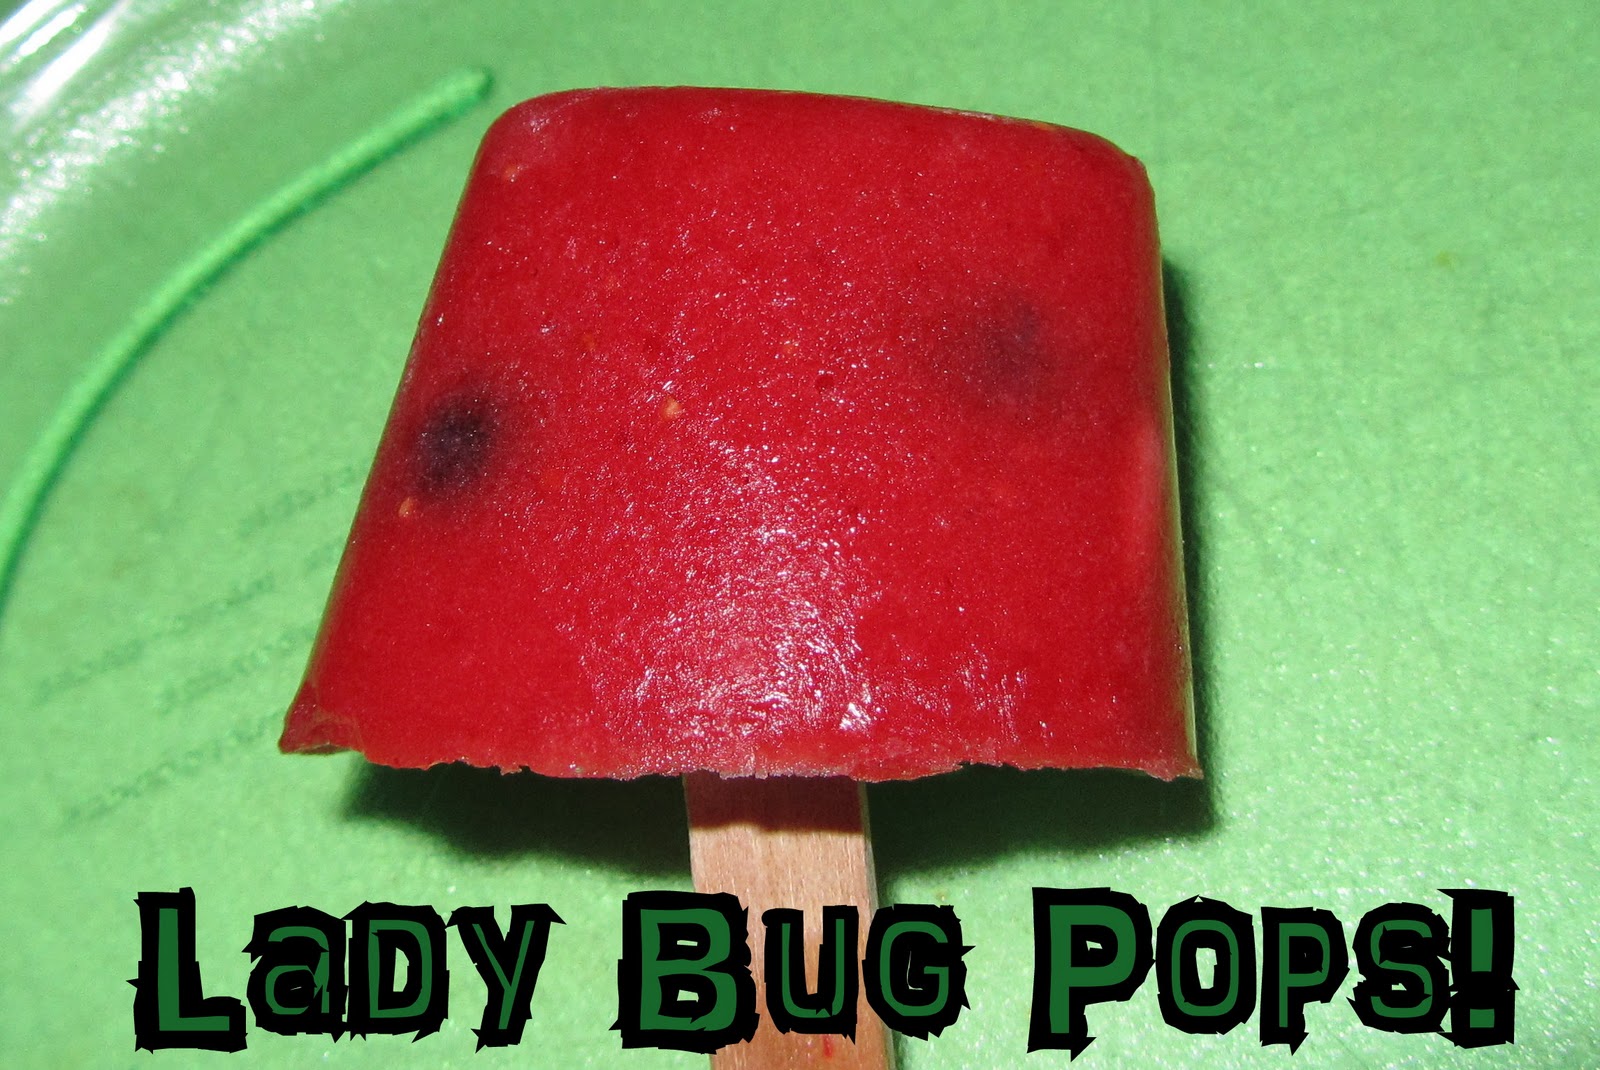
Lady Bug Pops

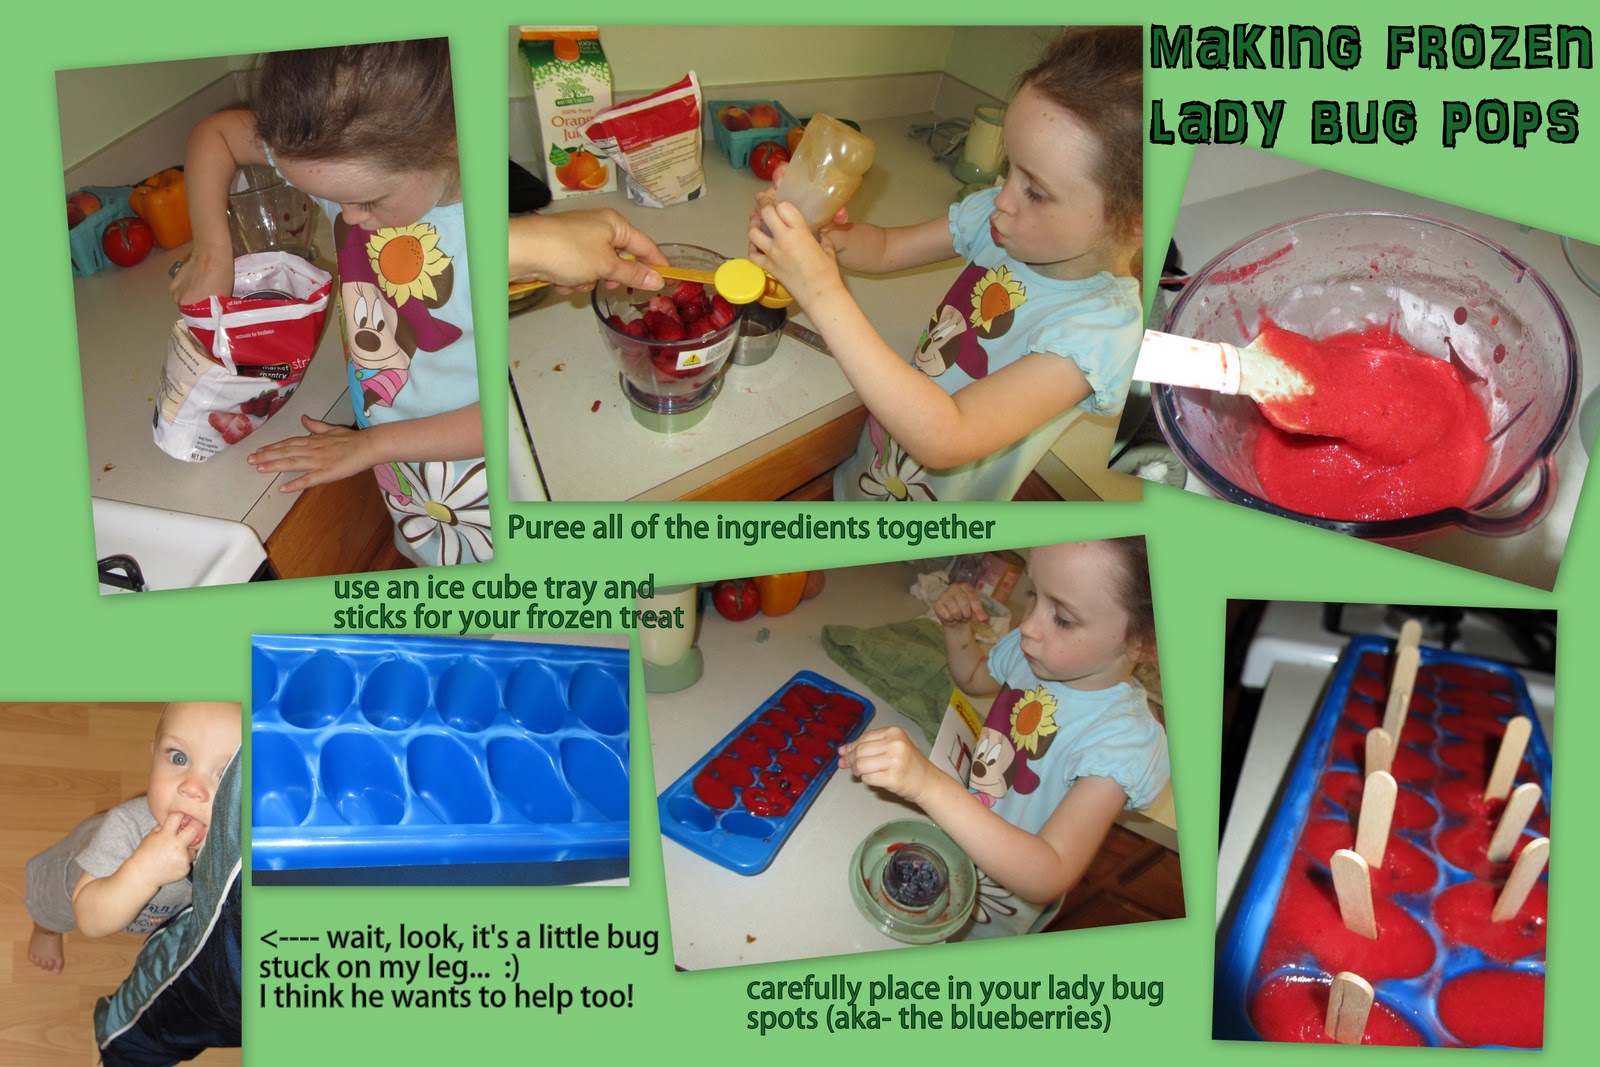
Yummy note: I wish I could take credit for these cute little lady bug frozen pop treats, but our Food Network foodie goddess Giada De Laurentiis beat us to the punch! Alicia has been wanting to make popsicles and when we saw this come on the tv the other day, she was thrilled and wanted to make them! They are pretty simple to make and are easy to put together even with lots of little hands around the house...


Lady Bug Pops
Original recipe here:


Ingredients:
4 cups of frozen strawberries, chopped (Yummy note: You could use fresh strawberries, but we used the frozen ones for ease and quicker preparation)
1/4 cup orange juice
2 tablespoons lemon juice
2 tablespoons honey
1 cup of blueberries

Directions:
Puree all of the ingredients, except for the blueberries together until smooth. We used our baby bullet system for it, but a blender would work just fine. Next, pour the smoothie mixture into ice cube trays. Place the "lady bug spots" (blueberries) in each individual ice cube. We managed to stuff about 2-3 blueberries in each one. Freeze for 1 hour or until fruit mixture begins to thicken a bit. Then insert a stick into each cube and freeze another 3 to 5 hours until firm. Empty ice cube trays and enjoy your frozen lady bug pops!


"Mommy, these are cool..." 

Monday, September 19, 2011

Butternut Squash Gnocchi with Moroccan Sauce

Yummy note: I love this part of the month, what is it you ask... it's Secret Recipe Club time, when I read about all the fun that the other food bloggers are having. There are so many wonderful blogs out there where people are opening their kitchen windows and letting us peek in at their passion of food, writing, and photography. For September’s Secret Recipe Club recipe post, I am featuring Jenny's Butternut Squash Gnocchi with Moroccan Lamb Sauce from her blog called Savour the Senses. I began my search on Jenny's blog and realized this her first month to the Secret Recipe Club fun, so say make sure you welcome Jenny to the club!  So as I began this month's journey, it often requires some searching through my assigned blogger’s site for hours, then I get distracted and see several recipes I love, and then, it seems like days later, I find that just right recipe. I really enjoyed this blog post by Jenny as it totally sounded like something that would happen to me, as she mentioned, “Don’t get me wrong, the dish was delicious, I just had a few mishaps while trying to prepare it.” – Oh, that is totally me, I thought, as I always seem to hit bump in the road to steer me a bit off track no matter what I do. This gnocchi is so versatile that I used it in two different dishes already this month! Also the meat sauce I'm sure would be delicious on top of rice or any other pasta, as the seasonings are just wonderful. So don't be afraid of the heat or spices in this dish, as it is similar to the heat of a good bowl of chili. Jenny, thank you for inspiring me to take the challenge this month and make some wonderfully tasting homemade gnocchi with a Moroccan-inspired sauce.


Butternut Squash Gnocchi with Moroccan Sauce


Original recipe adapted slightly from Savour the Senses

Ingredients:
For the Butternut Squash Gnocchi:
About a 2-2.5 lb butternut squash (need to yield about 1 ½ cups of squash flesh)
3 eggs
1 cup flour (plus a few tablespoons more if needed)
1/2 cup grated parmesan cheese
1 tsp salt
1/2 tsp pepper

For the Moroccan Meat Sauce:
2 tsp olive oil
small onion (diced)
2 tsp minced garlic
1/2 lb ground beef
1 tsp ground cumin
1/2 tsp chili powder
1/4 tsp sweet paprika
1/4 tsp ground cinnamon
1/4 tsp ground nutmeg
1/4 tsp red pepper flakes
1 large can of diced tomatoes
1 small zucchini
1 small yellow summer squash
Salt/pepper to taste


Directions:
For the Gnocchi – Preheat the oven to 400 degrees. Prepare the butternut squash for roasting: Chop the top and bottom off of the squash, then cutting it in half lengthwise, and remove the seeds. Roast the squash by placing them cut side down on a baking pan, and bake for about an hour or until it is fork tender. At this point, I let my butternut squash cool before I started to mix the gnocchi dough. I’m not sure if you really need to let it cool before processing, but I did and it seemed to work fine. I did what fit into my schedule, and that was to let it chill for a bit and come back to it when I had more free time. Once you have your squash flesh cut out of the shell, measure out roughly 1 ½ cups of butternut squash.


In a food processor, (I used my dough hook), begin pulsing together the squash, eggs, parmesan cheese, salt and pepper. Add in your flour and pulse the dough until combined, you may need to continue adding more flour if the gnocchi is too sticky. It should appear kind of smooth when all of the flour is incorporated. I wish I had better advice to offer on when the dough is “ready” but I am not sure, since this was my first time making gnocchi! :) So once you think the gnocchi dough is “ready,” bring a large pot of water to a boil. Using a scooper, drop about a tablespoon of the gnocchi mixture into the boiling water. Scoop several gnocchi into the boiling water and cook for about 3-5 minutes or until the gnocchi starts to float. Once they begin to float, take them out of the pot to drain. Repeat until all of your gnocchi is done.


I really enjoyed this gnocchi, as I ended up using it in two different recipes! Besides making the meat sauce recipe from Savour the Senses, I also made a wonderful Chicken and Gnocchi soup with my cute little gnocchi, which I will save that recipe for another day.. :)


Also note, it was super easy to freeze too, just let them dry a bit before putting them into the freezer so that they don't stick together. Ok, as I wander thinking about other yummy food, back to the Moroccan Meat Sauce from Savour the Senses.

For the sauce- Heat the olive oil, onion and minced garlic over medium heat for about 5 minutes, just until the onions start to get soft. Then add in your ground meat choice and brown the meat; I used beef, but in Jenny’s original recipe she used lamb, so use what you’d like. At the same time, add in your spices, and stir. Next, add in can of tomatoes and chopped squash and zucchini chunks.


Simmer the sauce, uncovered until it starts to thicken up, probably about 15-20 minutes. For the last few minutes, add your gnocchi back into the pan and let the flavors mingle together while the gnocchi reheats in the sauce. Season with additional salt and pepper to finish and enjoy.