

No Knead Bread
Ingredients:
3 cups all-purpose or bread flour, more for dusting (I did a mix, but I'm sure you could experiment with the proportions to get different results.)
1/4 tsp instant yeast
1 1/4 tsp salt
1 1/2 cups water
3 cups all-purpose or bread flour, more for dusting (I did a mix, but I'm sure you could experiment with the proportions to get different results.)
1/4 tsp instant yeast
1 1/4 tsp salt
1 1/2 cups water
Directions:
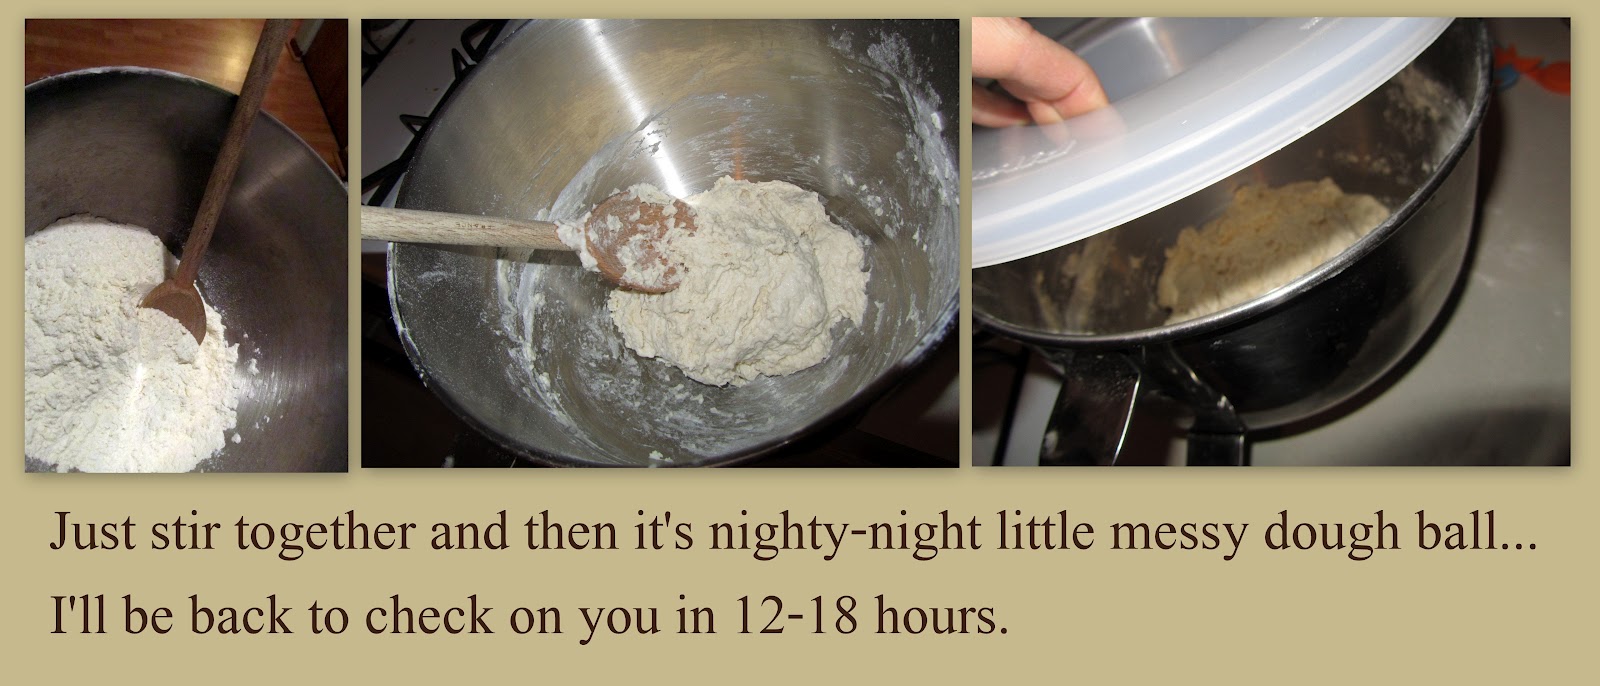
In a large bowl, stir the flour, yeast, and salt together. Add water and stir until blended. Dough will become sticky and what Amy called "shaggy." Cover the bowl with plastic wrap. Then this is the hard part... let the dough rest AT LEAST 12 hours, preferably about 18 hours, at room temperature.
In a large bowl, stir the flour, yeast, and salt together. Add water and stir until blended. Dough will become sticky and what Amy called "shaggy." Cover the bowl with plastic wrap. Then this is the hard part... let the dough rest AT LEAST 12 hours, preferably about 18 hours, at room temperature.
After 12 hours, you could perhaps peek at the dough and see what it looks like. The dough should be fine to use, once it is looking more airy and you can visibly see some bubbles or bubble-like formations towards the top. Lightly flour a board or area, and place your wet sticky dough on it. Sprinkle your mass of dough with a little more flour and fold it over on itself once or twice, just so it deflates a bit. Then cover loosely with plastic wrap or a clean kitchen towel and let it rest about 15 minutes.

Next, add a bit more flour to keep the dough from sticking to the work surface or to your fingers, and gently and quickly shape the blob of dough into a ball shape. Sprinkle with flour, and cover again with your towel or plastic wrap, and let it rest once again for another 1-2 hours. Halfway through this rise, check the note below about preheating your oven. The dough is ready once it is doubled in size.

While bread is in the last rise, preheat your oven to 450 degrees and put a 6-8 quart heavy covered pot (like a cast iron, Pyrex, or ceramic pot) in oven as it heats up. After the dough has finished with the last rise, carefully remove the hot pot from oven. Tip dough over into the pot and cover with lid and bake 30 minutes.

Then remove the lid and bake another 15 to 30 minutes, until loaf is a golden brown. I added on a few dots of butter at the last few minutes also to create more of a golden color and buttery top of my bread, too. (This is optional though.) Cool on a rack before cutting.

Check out all of the other wonderful posts in this month's Secret Recipe Club!

Oh my, this sounds like a fabulous recipe! I have never made no knead bread like this but I think I am in love. I will definitely try this recipe soon.
ReplyDeleteHoly Cannoli Recipes
Glad you enjoyed it! It is definitely one of our favorite recipes, hands down!
ReplyDeleteI love the butter on top - looks so good. Great job.
ReplyDeleteI love easy bread! This WOULD be great with corn chowder!
ReplyDeleteI have yet to try my hand at bread baking as it scares me but you've made it look so easy and your bread is gorgeous. Great SRC choice and wonderful job.
ReplyDeleteIf you haven't already, I'd love for you to check out my Group 'A' SRC entry: Crunchy Fudgy Heart Bites
Lisa~~
Cook Lisa Cook
what an awesome, easy bread recipe, will definitely try it. life is better with fresh made bread:)
ReplyDeleteI'm always happy to find easy bread recipes and this one looks right up my alley. Will try this for sure!
ReplyDeleteI love a crunchy bread! that's my favorite part! I'm stopping by from SRC but I'd love if you check our my new site seasonalpotluck.com February is oranges month so if you have any orange recipes, we'd love if you'd link up! http://bit.ly/zDoNfx
ReplyDeleteI think this bread looks delicious - I love it chewy on the inside! If you haven't had a chance, please stop by and visit my SRC post for Giant Chocolate Toffee Cookies
ReplyDeletehttp://butteryum.blogspot.com/2012/02/giant-chocolate-toffee-cookies.html
:)
ButterYum
haha Perfect! No Knead Bread is my kinda bread!
ReplyDeleteI have never mad bread, but would like to try this! I am a new follower. Patsy
ReplyDeleteLooks fantastic!!!
ReplyDelete