Friday, September 1, 2017

Cinnamon Crunch Nuts


Yummy note: This is a love and hate snack in my house. I just love these cinnamon crunch nuts and will eat them any time of day for a quick bite. However, my kids both have nut allergies, so whenever I make it, they give me the evil eye and are like, seriously, mom, you are making a yummy smelling treat that we can't have?! Yes, my darling kids, sorry, it is not all about you this time, haha. So now I try and make it when they aren't around or late at night to stop teasing them with the waffling smells of cinnamon and nuts in the house. Just so you know, the other bad part of this snack, it can be quite addicting; the cinnamon sugar spice goodness and the saltiness combined with the crunchiness, yeah, the ultimate sweet and salty snack. Good luck trying to stop with just a few of these bad boys. These cinnamon crunch nuts are amazing when tossed with granola on top of yogurt or ice cream.

Ingredients:

1 egg white
2 tablespoons Fireball Whisky (or can substitute with water)
1 tablespoon butter
1 pound pecan halves or other mixed nuts
1 cup white sugar
3/4 teaspoon salt
1 teaspoon - 1 tablespoon ground cinnamon (depending on how spicy you like them)

Directions:
Preheat oven to 250 degrees F. Line baking sheet with parchment paper. In a mixing bowl, whip the egg white until frothy. In a separate bowl, melt butter and whisky together. Mix together sugar, salt, and cinnamon. Add nuts to the foamy egg white, add butter and whisky and stir to coat the nuts evenly. Toss the nuts in the cinnamon sugar mixture until coated. Spread the nuts out on the prepared baking sheet. Bake at 250 degrees for anywhere between 45 minutes and 1 hour, or until coating starts to crunch up. Stir nuts every 15 minutes. Depending on your oven and mixture of nuts used, sometimes they are ready within 30 minutes of bake time, so keep a close eye on them so they don't burn. 


Tuesday, August 30, 2016

Zucchini Salsa

Yummy note:
This is my first year with a much larger garden. I will say right now that my garden has been getting out of hand lately with the weeds and ground cover. I was doing fairly well early on, but it has recently got crazy-so if anyone has tips to control the weeds for next year, I'm all ears. I am honestly about ready for it all to be done for the season. The early raspberry bushes are done and have been pruned, the pumpkins are going well with about 6 pumpkin babies, however the vines have also took over a good portion of the garden. I am still getting a handful of peppers and zucchinis, too, which is nice for a late harvest. And then there's the tomatoes, they are close to fizzling out. However, I really got a decent crop out of my tomato plants this year, so I can not complain about that. I've planted a few different varieties, ranging from roma to heirloom, so I've been able to get some nice batches of salsa and tomato sauces. A few years ago, a friend introduced me to this zucchini salsa, which is similar to this recipe below. The biggest difference between the two, is the time involved in making the salsa though. The original recipe takes a 2-day approach with the zucchini in a brine overnight, while this one incorporates a sautéed zucchini instead and only takes a few hours start to finish realistically. Both recipes are on the mild side and not a lot of heat, but you could easily ramp up the heat by putting in more jalapeños and their seeds or a hotter pepper. This recipe yields about 8 pints of salsa.  


Zucchini Salsa

Ingredients: 
8 cups of tomatoes (peeled and chopped)
olive oil 
1 1/2 lbs of zucchini (about 6 cups shredded) 
1/2 tsp salt 
4 cups of diced sweet onions 
jalapeños, diced 
1-2 habaneros, diced 
2 bell peppers, diced (either red, orange, or green)
4 chipotle chiles in adobo sauce, diced 
6 garlic cloves, diced 
1 tbsp cumin
1 tbsp dried parsley
1 tbsp dried oregano
1/2 tsp salt 
1 tsp ground black pepper 
1/3 cup of light brown sugar 
1 lime, juiced and zested 
1 1/2 cups of vinegar, 5% acid
12 ounces of tomato paste 
1-2 tbsp fresh basil or 1-2 tbsp fresh cilantro

Directions: 
Yummy note: This recipe is to be canned using the waterbath canning process. If desired, you could always cut down the ingredients and make a smaller batch and not can this recipe for a fresh salsa. 
Prep tomatoes by placing them in a pot of boiling water. Remove after about 30 seconds or once you see the skin beginning to peel. Then place them into a bowl of ice water to cool before removing the skins. Remove the skins and cores and chop tomatoes. Place the tomatoes in a strainer over a bowl to catch the juices. In a large stock pot, drizzle in a little olive oil and add the shredded zucchini and 1/2 teaspooon of salt and sauté the zucchini until it starts to reduce. After the zucchini has reduced down and is less watery, add in the reserved tomato juice from the chopped tomatoes to the pot and cook for an additional 10 minutes or until most of the liquid is gone. While this is reducing, chop and prep all of your other vegetables. Next, add in all of your other ingredients, except for the fresh basil and cilantro. Simmer over medium heat for about 30 minutes. If the consistency seems to thick or chunky for your liking, you can finish up and puree the salsa a bit with a quick pulse of a hand blender. Just be careful not to splatter the hot salsa. Finish by stirring in the fresh basil or cilantro. Fill hot clean sterile jars with the salsa and check for air bubbles with a spatula and wipe the jars edges clean with a damp cloth, and screw on bands. Adjust the bands so they are not super tight, but just enough so that they are on there with slight resistance. Process the jars for 15 minutes in a boiling waterbath canner. If the jars do not seal properly, place the jars in refrigerator and use within the next few days. Store canned jars and use within a year or so. Yields 8 pints. 

Yummy note: New to canning - Check here for some tips - http://www.freshpreserving.com/canning-101-getting-started.html


Wednesday, June 15, 2016

banana bread variations

Yummy note: This original recipe is one of my old standbys. I recently modified it slightly to reduce the amount of sugar and replaced regular vegetable oil with a healthier substitute of coconut oil. This is a great basic banana bread that stays delicious for several days even after you make it. Or if you make bigger batches, you can always freeze and they thaw out nicely for a quick breakfast snack. We like making the mini loaves at our place, in order to be able to change up the flavors a bit. Usually we have a few plain traditional loaves, plus some cinnamon swirl, chocolate chip, any my recent favorite variations here - peanut butter swirl and whiskey banana bread. Have fun experimenting and enjoy the flavor combinations. 


Peanut Butter Swirl Banana Bread

Ingredients: 
3/4 cup sugar
1/2 cup coconut oil
1 tsp baking soda
2 tbsp orange juice
2 eggs - well beaten
3 large ripe bananas - mashed
2 cups flour
3-4 tbsp peanut butter 

Optional: 
1/4 cup chopped nuts, dried fruit, or chocolate chips
  
Whiskey Banana Bread 

Ingredients:
3/4 cup sugar
1/2 cup coconut oil
2-3 tbsp whiskey
2 eggs - well beaten
3 large ripe bananas - mashed
1 tsp baking soda2 cups flour
Directions:
Preheat oven to 350 degrees. Mix slightly softened coconut oil and sugar together in a large bowl. In a smaller bowl, mix orange juice and baking soda until bubbly and stir in eggs and mashed bananas.If using the whiskey variation, just replace the whiskey with the orange juice in the above step. Next, pour that into the larger bowl with the oil and sugar bowl and mix. Lastly, add in the flour to the larger bowl. Stir well, but try not to over mix it. Pour batter into greased loaf pans. Stir in your optional mix-in ingredients; whether it be, chopped nuts, chocolate chips, dried fruit, or peanut butter. With the peanut butter swirl, place a peanut butter on the top of the batter and take a knife and swirl it in. Bake accordingly to the size of pan you choose. For about 8 mini loaves - bake about 13-15 minutes, for 4 small loaves - bake for about 25-30 minutes, and for a larger pan, bake roughly about 1 hour. Continue to bake until an inserted toothpick comes out clean.


Tuesday, March 29, 2016

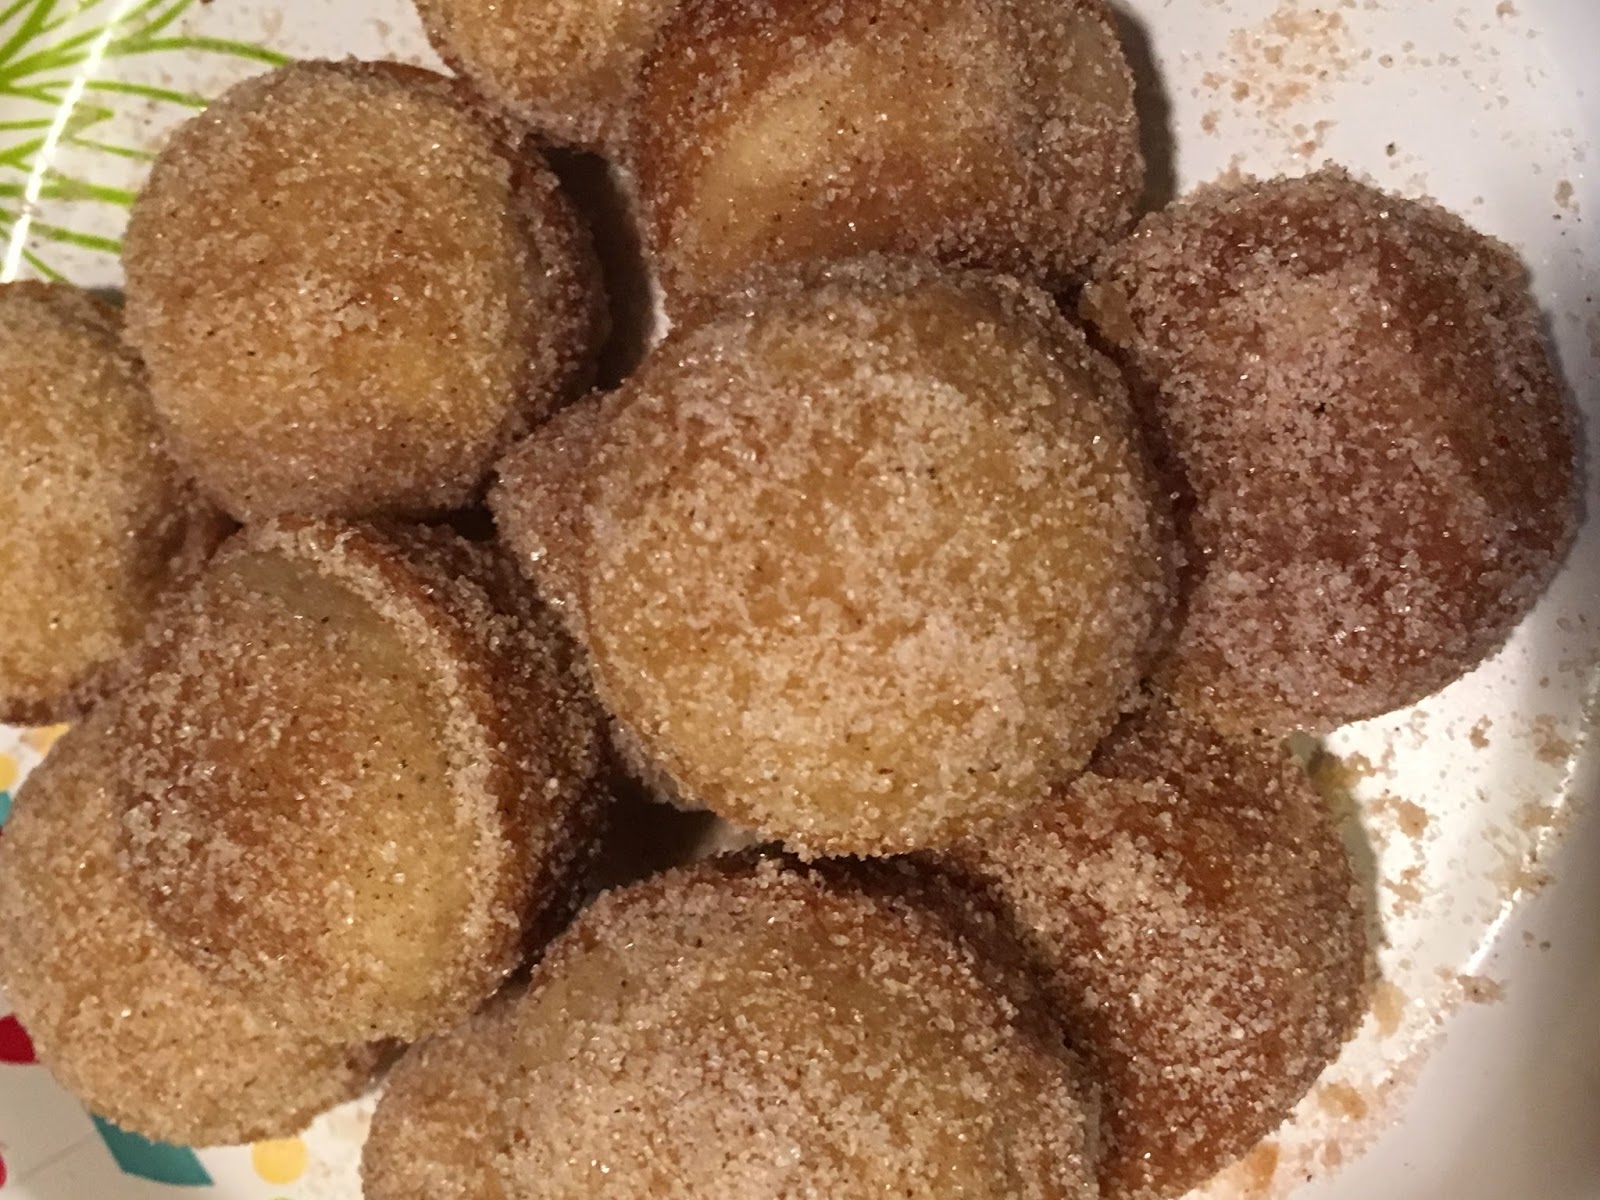
Baked Donut Muffins

Yummy note: Holy cow, stop and drop what you are doing now, and make these guys. Baked donut mini muffins are amazing. We whipped up a batch for breakfast, and by the end of the day, I think they were all gone, as they were heavenly. We couldn't stop eating them, the sugary and spice flavor really hit the mark with what a donut should taste like. The nutmeg was the real flavor winner in this recipe and shouldn't be replaced with another spice. What was even better, this particular recipe was easily adapted to be dairy-free for my allergy kiddos, so they could enjoy it, too.


Baked Donut Muffins


Ingredients:
Muffin Batter: 
1/2 cup of sugar
1/4 cup of butter, melted
3/4 tsp of ground nutmeg
1/2 cup of milk
1 tsp of baking powder
1 cup of all-purpose flour

Coating:
1/4 cup of butter, melted
1/2 cup of sugar
1 tsp of ground cinnamon

Directions: 
Preheat oven to 375 degrees. Mix 1/2 cup of sugar, 1/2 cup melted butter, and nutmeg in a large bowl. Stir in the milk and add in the baking powder and flour until just combined. Spray or grease a mini-muffin tin. Fill the prepared mini muffin tins about half full. Bake in the preheated oven for about 15 to 20 minutes or until they start to brown on top. While donut muffins are baking, melted the other 1/4 cup of butter in a small bowl. In a separate bowl, or brown lunch bag, mix together the other 1/2 cup of sugar with the cinnamon. When muffins are done baking and cool enough to touch, dip each muffin lightly in the melted butter and coat in the cinnamon and sugar goodness. You can also shake them up in a brown bag for evenly coated yumminess.


This makes about 24 mini muffin donut bites.


Thursday, February 4, 2016

Granola

Yummy note: 
Just recently I've been making my own granola more, I really don't know why I didn't before. It's great, as you can control the quality of the ingredients that go into the granola, which in turn makes it amazing compared to the prepackaged store stuff. My kids have several allergies to contend with so it is often easier for me to just make my own stuff than to buy and contend with potential contamination. I found this granola recipe, seriously to no surprise from Alton Brown. My daughter recently has been getting hooked on old Good Eats episodes, so it's awesome to find gems like these and rewatch with her. Did I mention before that I got to meet him a few years back and he's got to be one of my favorite food aficionados. So thank you Mr. Alton Brown for your amazing granola recipe, as it is hands down a keeper in our book and always gets rave reviews.  


Granola 


Ingredients:
3 cups rolled oats or old-fashioned oatmeal
1 cup slivered almonds*
1 cup cashews*
3/4 cup shredded sweet coconut
6 tablespoons dark brown sugar (equivalent to about 1/4 cup plus 2 tablespoons)
6 tablespoons maple syrup (equivalent to 1/4 cup plus 2 tablespoons)
1/4 cup vegetable oil or coconut oil
3/4 teaspoon salt
1 cup raisins

Directions:
Preheat oven to 250 degrees. In a large bowl, mix together the oats, nuts, coconut, and dark brown sugar. In a separate bowl, combine the maple syrup, vegetable oil or melted coconut oil, and salt. Pour the liquids into the dry ingredients and stir well to coat mixture evenly. Spread out the granola onto 2 large cookie sheet pans. I lined my pans with parchment paper, but I don't think it is necessary. Cook for 1 hour and 15 minutes, stirring every 15 minutes to ensure the granola does not burn and to achieve a nice brown and crunchy golden granola. Remove pans from the oven and pour granola into a large bowl and mix in any additional dried fruit or raisins. Keep stored in an airtight bag or container. This will keep for several weeks usually, if it lasts that long in your house before it is gone. :)

* Yummy note- I have swapped out these ingredients to be sunflower seeds and other dried fruit to give it crunch and variety to eliminate the nut allergy concerns. Also, this recipe can be done in a dehydrator or oven. I've done it both ways numerous times and it has worked great. If using a dehydrator, dry according to the manufacturers recommendations, but usually the granola takes about 4-5 hours to achieve desired dryness and crunchiness.


Sunday, January 17, 2016

White Chocolate and Cranberry Biscotti

Yummy note: So anyone that knows me, I really enjoy baking and cooking for others; especially, doing surprise goodie drop-offs or mailing a fun package out to friends with a yummy treat delivered at their door. This winter, I thought I'd add another treat to cookie day, besides our typical sugar and gingerbread cookies and make some biscotti. I've never made biscotti before, but I knew it would hold up well for traveling and it lasts long so that making it a few days before getting to hand them out wouldn't be an issue. This month's Secret Recipe Club pairing had a biscotti recipe that was a perfect choice- White chocolate and berry biscotti sounded good to me! This month's Secret Recipe Club feature recipe is coming from Nayna Kanabar's blog called Simply.Food. Nayna's blog has a variety of recipes and features them all with a vegetarian flair. What also is nice about Nayna's blog Simply.Food is that many of the recipes are pretty straight forward and easy to execute without a lot of craziness. Two more recipes on my radar that I can't wait to try from Nayna's are these: I'm a sucker for a good rice pudding, however the last recipe I tried to use, it was a miserable fail, so I might have to try out her recipe for rice pudding in hopes for perfection! Also these bread rolls look bakery perfect and the recipe isn't too scary or time consuming, so I think these would be amazing with the next bowl of homemade soup I make! Happy Secret Recipe Club reveal day. 


White Chocolate and Cranberry Biscotti 

Ingredients: 
2 cups flour
1 tsp baking soda
1/2 tsp salt
3/4 cup sugar
2 eggs
1/3 cup mild-flavored olive oil
1/3 cup water
1/2 tsp vanilla extract
1/2 cup white chocolate drops
1/2 cup dried cranberries

Directions: 
Preheat oven to 375 degrees. Sift together the flour, baking soda, and salt. Add in the sugar, dried cranberries, and white chocolate chips. In a separate small bowl, mix together the wet ingredients- eggs, water, vanilla, and olive oil. Add the wet mixture to the dry mixture a little at a time until the flour form a dough. Once the dough has formed, divide it into two loaves. Bake on a greased and/or parchment-lined baking sheet. Bake for about 40 minutes until golden and then let the loaves cool completely. Next, using a sharp serrated knife, cut the loaves on a diagonal into 3/4-inch-thick slices. Place biscotti on baking sheet again and bake the biscotti slices for the second bake, about 15 minutes, until they are golden brown on top. Cool completely before enjoying or packing up.

White chocolate chips and cranberries went into this biscotti, but I'm sure many other varieties would be delicious. 
Mixing it all up.
Forming loaves of biscotti dough. Warning, this gets a little sticky :) 
Biscotti loaves after the first initial bake. 
Good looking white chocolate and cranberry biscotti ready for the double bake. 
Have biscotti - ready to travel! 
Biscotti individually packaged up perfect for sharing.


Thursday, January 7, 2016

Roasted Brussels Sprouts with Butternut Squash and Bacon

Yummy note: I had seen several of these fall or Thanksgiving-inspired recipes floating around before using some amazing fall and winter vegetables and I knew I had to give them a try. I just adore brussels sprouts and butternut squash on their own, so why not bake them all together in a big dish-- yes! Then adding in the bacon and onions, who could resist that in the crowd I wanted to feed. I was slightly skeptic on the brussels sprouts, as they can be a bit intimidating or overpowering for people, so I knew I had to win them over. I made this dish twice for family gatherings around the holidays and I had like no leftovers and people ate it up, and kept asking for the recipe, so I guess this side dish was considered a hit.  


Roasted Brussels Sprouts with Butternut Squash and Bacon 

Adapted from these recipes: 
http://www.williams-sonoma.com/recipe/brussels-sprouts-squash.html   http://www.perrysplate.com/2013/12/roasted-brussels-sprouts-and-butternut-squash-with-bacon.html    http://itsyummytomytummy.blogspot.com/2014/11/roasted-brussels-sprouts.html


Ingredients: 
1-2 pounds of brussels sprouts, ends trimmed off and cut in half
1/2 of a butternut squash, peeled and diced (cut into smaller 1/2-inch cubes)
4 tablespoons garlic-infused olive oil
4-5 slices of thick-cut bacon, diced or crumbled
half of onion, diced
salt and pepper to season
* optional - add in 3-4 diced carrots 

Directions: 
Preheat oven to 425 degrees. Place trimmed brussels sprouts and diced butternut squash in a large 9x13 baking dish. Depending on the amount of vegetables you have, you may need two pans to distribute them. Toss the veggies in the garlic olive oil until coated.  Spread them evenly in the pan and sprinkle generously with salt and pepper and place in the oven. Meanwhile, on the stove top, saute the diced onions and bacon until soft and partially done. Check the veggies after about 20 minutes of roasting, and then add in your bacon and onions to the veggies and mix together to infuse all the flavors. In the next 15-20 minutes, the squash should be starting to get fork tender and done. Keep a close eye on the brussels sprouts so that they don't start to burn, and stir every few minutes if needed towards the end. The vegetables will start to almost caramelize at the end and begin to turn a golden brown when ready.


Monday, December 14, 2015

Chicken tortilla soup

Yummy note:
I've seen variations of this Chicken Tortilla Soup recipe floating around many times before, but never got around to trying it out until recently. I wish I had tried it earlier, as it was delicious and easy to throw together in the crock pot. I've had something similar where we did like a dip and just ate it with chips, but that seemed to not be as healthy of a supper option, rather than if we just made a soup instead. So if you need a quick prep meal and are in lack of time, all you really need to do is toss these all in your crock pot and you are good to go. In just a few hours, you have a really flavorful, not too spicy chicken tortilla soup. If you want to spice it up more, I'm sure if you add in a can of green chilies that would really add some kick fairly easily. Also, if a crock pot isn't your thing in the kitchen, you can easily use this recipe below and just make on the stove and in short time, you'll have some amazing semi-homemade soup to enjoy! 


Chicken Tortilla Soup

Ingredients:
2 cups leftover cooked chicken or rotisserie chicken 
2 cups of chicken broth 
1 can of condensed cream of chicken soup 
1 jar of picante or salsa 
1 bag of frozen southwest corn  
1 can of black beans 
1 tsp cumin 
1 tsp chili powder 

Optional: 
1 cup shredded cheddar cheese
corn tortillas or corn chips to garnish
cilantro to garnish  

Directions:
In your crock pot, mix together broth, can of condensed cream of chicken soup, picante, corn, black beans, cumin and chili powder. Dice or shred any leftover chicken or rotisserie chicken and add to the crock pot. Cover soup and set on low for 4 hours. At the end, you can stir in cheddar cheese if you wish. You can also reserve the cheese for the top and garnish the soup with the cilantro and cheese and then serve with corn tortillas on top. Yummy note: If you are in a super hurry, you can always make this soup on the stovetop as well. All you need to do is add of the ingredients in a large stock pot and simmer for about 15-20 minutes, stirring occasionally, until they are all cooked through. Again you would add your cheese, cilantro, and corn tortilla chips at the end. 

 
I used leftover smoked shredded chicken that I had in the freezer. 

Mix all of the ingredients together in the crock pot and that's it - super easy prep!  
Add cheese and cilantro either to the soup or garnish with at the end.
Hearty chicken tortilla soup

Sunday, November 15, 2015

Chocolate gelato

Yummy note: This month has begun to get away from me at bit. It was literally just Halloween, I thought... then I looked at calendar and yikes, halfway to Thanksgiving already!?! what happened to November. Oh, I recall, we have been having some amazing warmer weather days for us in the Midwest and we've been taking advantage of it some. Sneaking in those extra park trips, walks outside, fishing, and playing in the yard and raking up all those leaves! I thought it was going to slow down a bit since the soccer and other fall activities wrapped up but I guess I was wrong. With this nicer weather, the kids thought it would be fun to make ice cream. We haven't made ice cream in while so I told them sure, and convenient enough, it was Secret Recipe Club time!  So why not start there.. I was in luck, my blogger for this month was Jane from over at The Heritage Cook! Yeah, I love Jane's site, perhaps it is that she has this feature called Chocolate Mondays.. Oh boy, Chocolate Mondays! What a great concept, I sure would enjoy some chocolate goodies after a long weekend to start the week off right ;)  Jane has such great a variety of recipes that you are bound to find a recipe that fits your taste buds. Also, Jane does such a great job lending a hand out in our Secret Recipe Club too, so she is a busy lady! Back to the task... Kids want ice cream.. so here's the short list..  Darkest-chocolate-in-the-world-ice-creamPumpkin-ice-creamsummer sorbets, and chocolate gelato... the Heritage Cook offers many dietary alternatives, so I was thrilled to find a few potentials. However, the one requirement I had was the recipe must be both dairy-free and nut-free so that both kids could enjoy it, as I was not up for making two different batches today. This chocolate gelato recipe was the winner, also I've never made a gelato before so this was new. Gluten-free, dairy-free, nut-free, is a winner in my book at home. This chocolate gelato sure doesn't taste free of anything though! It was amazing rich and full of chocolate goodness.


 Chocolate Gelato 
 Original recipe from The Heritage Cook

Ingredients:
1/2 cup of unsweetened cocoa powder 
2 (14 oz) cans of "lite" coconut milk (about 3-1/2 cups)
1 tsp of vanilla extract 
3/4 cup plus 2 tbsp of sugar 
2 tbsp of cornstarch 
1/8 tsp of salt 

Directions: 
Measure cocoa powder into a bowl and whisk in a small amount (no more than 2/3 cup) of coconut milk to make a smooth paste and then stir in the vanilla. In a separate sauce pan, mix sugar, cornstarch, and salt. Gradually whisk in the remaining coconut milk into the sugar mixture and heat over medium heat. Stir coconut milk mixture frequently. Once the mixture begins to just simmer, keep stirring. The mixture should simmer for about 2 1/2 to 3 minutes to fully cook the cornstarch. Note- keep stirring mixture constantly to prevent it from burning or sticking to the bottom or sides of the pan. Next, pour the hot milk mixture into the bowl with the cocoa paste. Whisk both together until it is well blended. Let chocolaty mixture just sit without touching it and let it cool for about 45 minutes. Then cover bowl and refrigerate until very cold, at least 3-4 hours. This gelato mixture can be made days in advance if needed. Next pour the gelato mixture into the frozen ice cream maker bowl. Run the gelato in your ice cream maker according the the directions. My ice cream maker turned the gelato into a softer set after about 25 minutes. To store, freeze the gelato in an airtight container. It should last in the freezer for a week or so. For the best gelato texture, let it soften slightly before scooping and serving. This recipe yielded about 1 quart of gelato.

Use quality ingredients with this simple recipe makes all the difference in taste. 

Mix the warmed up coconut mixture into the cocoa paste. 

Pour gelato mixture in the frozen ice cream maker container.  

Process ice cream for about 20-25 minutes or until soft set. 
Get ready to enjoy your homemade chocolate gelato! 

A rich dessert served with berries and chocolate sauce drizzle.