Thursday, July 11, 2013

Dry Rub for Pork

Yummy note: Summer is all about the grilling at our place, we love to grill, and try to grill out several times a week or as many times really that our schedule allows. We've been enjoying ribs and pork tenderloins more this summer since I've recently figured out how not to mess up pork and make it overly dry and yucky. Keeping pork moist is sometimes tricky, but I've found out that by using a dry rub on it, it helps keep the moisture in and adds lots of flavor. The kids have even liked this dry rub on the pork, as it is not too spicy, but has a nice, almost, sweeter barbecued flavor. 

Dry Rub for Pork


Ingredients: 
2 tablespoons of paprika
1 tablespoon of fresh ground pepper
1 tablespoon of garlic powder
1 tablespoon of onion powder
1/2 tablespoon to 1 tablespoon of chili powder, depending on how much heat you want to add
2 tablespoons of coarse salt
2 tablespoons of brown sugar or white sugar


Directions: 
Mix all of the above ingredients together in a bowl, mixing thoroughly. Store in a container until ready to use. This recipe can be easily doubled for larger batches of ribs or pork roasts. This recipe covers about 2-3 lbs of meat. To use, just liberally coat the meat of your choice. Then grill or bake in the oven until you've reached desired temperature. Check out this great reference link from Pork Be Inspired for grilling/cooking time for various cuts of pork. 


Pork Tenderloin with Dry Rub 

Juicy pork on the inside, with a nice caramelized brown crust.

Dry Rub on BBQ Ribs


This dry rub makes great flavorful coated pork for tacos or burritos.

Sunday, June 16, 2013

Peanut Butter Fudge

Yummy note: Peanut butter, oh how I love thee. It is kind of like a bad word though around my house, as my daughter has a nut allergy. Luckily it is not so severe, that we can still have peanut butter in our house, whew, I can still get my peanut butter fix. So when I saw this Peanut Butter Fudge recipe on my Secret Recipe Club friend's site this month, I had to try it. Fudge consistency is huge for me, I really don't care for the super creamy fudges, so when Veronica from My Catholic Kitchen described it as "This fudge is like the inside of those eggs you get for Easter." I knew this recipe might just be what I was looking for... Actually I think it tastes very similar to that of a another recipe I almost made of Veronica's here called a buckeye. Both equally delicious, thanks Veronica. Make sure you stop by My Catholic Kitchen's blog for some inspiration and wonderful recipes. 


Peanut Butter Fudge 


Ingredients:
5 ounces of unsalted butter
2/3 cup smooth peanut butter
1/2 teaspoon salt
(Don't leave this out! It adds to the nice nutty flavor)
1 1/2 teaspoons vanilla
2 1/4 cups powdered sugar

Directions: 
In a small pan, melt butter and peanut butter together and then bring to a boil on high. (Alternatively, I also made this in the microwave too! In a microwaveable bowl, place butter and peanut butter and cover with plastic wrap. Microwave on high for about 1 1/2- 2 minutes.  Next stir mixture and microwave another 2 minutes, mixture will be hot and bubbly!) 


Remove pan from the heat after mixture starts boiling. Add in vanilla and salt. 


Stir in powdered sugar until smooth. Note the mixture starts to get really thick here! So stir it with some muscle to incorporate the powdered sugar well. ;-)  


Put the fudge into a 9 x 9 pan lined with parchment paper for easier removal. Allow to cool and store in the refrigerator until to cut into pieces and enjoy. 


Note: So I must admit, I tried this recipe out using a different type of peanut butter first. Like I said before I love peanut butter, so I have several types always in my cabinet. I have this one called PB2, which is a powdered peanut butter. It truly has a great fresh taste when you prepare the peanut butter, however it's make up is a bit different, it has less fat than the regular peanut butter, so the fudge did not turn out with the best consistency. However, it tasted really good, so I couldn't let it go to waste... so I dipped it in chocolate and made some chocolate covered peanut butter treats out of them instead. :) 


Have fun checking out the others in the Secret Recipe Club group C as they make some amazing culinary treats! 

Monday, June 10, 2013

Lemon Meringue Bars


Yummy note:
The other night I was hungry for lemon meringue pie, but really didn't want to make a whole big pie. For some reason, no one else really would probably eat the pie with me in my house and I'd have to eat the entire thing! So I opted to make a different variety of the lemon meringue pie by converting it into bars. I had the same flavors as if it was in the pie format-- a graham cracker buttery crust, tart lemony pie filling, and of course, ooey, gooey roasted marshmallow meringue-like topping. The bar format wasn't exactly portable, as I had to use a fork for a few of the times I ate them, but it was still really tasty, not to mention easy to throw together. So Lemon Meringue Bars were born. This was one of those late night creations I made, so I unfortunately didn't have a ton of pictures to go. Enjoy this summery treat. 


Lemon Meringue Bars 


Ingredients:
Crust: 
1 1/2 cups graham cracker crumbs
6 tablespoons butter, melted
4 tablespoons sugar

Filling: 
1 can of Lemon Pie Filling

Topping: 
about 2-3 cups of mini marshmallows 
(or enough to just give it a nice even single layer across the pie filling)


Directions:
Mix crust ingredients together and press in the bottom of an 8x8 inch pan that has been sprayed or lined with parchment paper for easy removal of the bars.  Bake at 350 for maybe 5-8 minutes just enough to start to set up the graham cracker crust. Pour over the can of lemon pie filling and place marshmallows on top to completely cover the lemon filling. Bake again for another 10-15 minutes or until marshmallows start to get a golden brown color. If the oven is not turning it to the golden brown you'd like, you could also put it in the boiler for a few minutes to speed up the process. Next, set aside and chill the lemon meringue bars before cutting. 


Sunday, May 19, 2013

Sangria

Yummy note: It has been a long time since I've posted a drink recipe on my blog here, so I thought for this month's Secret Recipe Club, a drink would be perfect. We just had a little dose of the warmer summer weather here, so a cool fruity drink would hit the spot! I saw that Eliot's Eats had several drink recipes that were appealing to just that...Rosemary Lemonade, Blackberry Margaritas, and Sangria, oh boy, they all sound fantastic. A few weeks ago, my husband and I celebrated his birthday at a local winery and they had amazing sangria, so this was my try at recreating a similar drink. I've never made a Sangria before and that sounded like a good recipe to try out. Thanks Debra from Eliot's Eats for such a great tasting recipe!


Sangria
Recipe adapted from Eliot's Eats 


Ingredients:
1 bottle Moscato
1/4 c. limoncello
1/4 c. Amaretto
1/4 c. agave nectar
club soda (to taste)
1 cup frozen mixed berries
2 apples, cored and chopped (leave the peels on)


Directions:
Use a big pitcher or a jug that would fit into the refrigerator. Pour the Moscato wine in your designated container. Add limoncello, Amaretto, and agave nectar and stir the liquids to combine. Add the frozen fruit and cut up apples. Set in the refrigerator for at least on hour to let the flavors combine and chill. Before serving add in the club soda. Serve chilled and enjoy. 

 
A big ole jug of Sangria ready for chillin'!

 
 Don't forget to add some fruit in your glass...in my opinion, that is my favorite part of this, and the addition of the club soda, which makes it nice and fizzy refreshing. 
 

Check out all of the wonderful other bloggers this month in the Secret Recipe Club below.

Tuesday, May 14, 2013

Jello Knox Blox

Yummy note: My kids love these Jello Knox Blox. It doesn't matter if they are little squares, hearts, or egg-shaped Jello pieces, they are all created equally, haha.. they all get gobbled up! These are much more friendlier for little hands than regular jigglers, which often are a bit more wiggly and end up on the floor :( This Knox Blox recipe was from my mom and now it always seems that my kids anticipate these Jello cubes from Grandma! 


Jello Knox Blox


Ingredients: 
4 envelopes of Knox unflavored gelatin
3 small boxes of Jello flavored gelatin*
4 cups of boiling water
*Note- 3 small boxes of sugar-free Jello works well for this recipe too.


Directions: 
Combine flavored gelatin and unflavored gelatin in a bowl. Pour the boiling water into the gelatin and stir until well combined and dissolved. Pour into pans and chill. We use an 8x8 pan if we want a thicker Knox Blox, or use a 9x13 pan if a thinner Knox Blox is desired. *Note, sometimes we will just mix the gelatin and boiling water right in the same pan we are refrigerating it in.

Mommy, I can help stir! 


Dress up the Knox Blox with a little whipped cream and fruit!


Monday, April 22, 2013

cadbury egg blonde brownies

Yummy note: Eeny meeny miny moe... How to choose this month's Secret Recipe Club recipe was about like that. I've never been so torn on what to feature! Julie's blog, Julie's Eats and Treats was awesome. So many easy and delicious-looking dishes to pick from, and what I loved even more about it was her stories. I found that Julie's fear of using yeast in many bread recipes was similar to mine over here, as it is soo finicky that I often mess something up with it as well! So, I have this recipe for homemade English muffin bread saved for later, as I really want to make this. We had just gone to Chili's over the weekend, so I had this vividly in my mind and thought about maybe making this salsa. However, I didn't have jalapenos on hand, and I was stuck at home without a trip to the grocery store any time soon, as it felt like the plague, aka stomach flu, had hit us all, so homebound we were...  Comfort food, dessert, yeah.. that's what the doctor ordered here, blonde brownies. This recipe came from Julie's grandmother, how fitting, as it always seems that it is those old recipes that I tend to get drawn to when feeling a little under the weather. I had some leftover Easter candy here, and I'm not a big fan of white chocolate by itself, so I added it into the brownies, like Julie suggested in this Cadbury Egg brownie version! Julie's Eats and Treats tag line is soo true-- Simple, easy but delicious food! 


Cadbury Egg Blonde Brownies

Ingredients:

1 cup of butter, softened - *I used a soy margarine here so it would be dairy-free to accommodate allergies
3 cups of brown sugar
4 eggs
3 cups of flour
2 tsp. of vanilla
1 tsp. of baking powder
1 tsp. of salt
1 bag of Cadbury Mini Eggs - *I used a half bag of Hershey's white chocolate coated candy eggs and a 1/2 bag of dairy-free mini chocolate chips here instead 


Directions:

In a big bowl, mix all of ingredients together, except for the chocolates. Mix well until they are all creamed together. Then spread into a 10x15 jelly roll pan. I wasn't sure on if it was a prepared greased pan, so I took precautionary measures and used some parchment paper on the bottom. *Note, it worked great. Then sprinkle the chocolates on top of the batter. They will sink into the dough as they bake, so if you want to reserve some of the chocolate for the end, you could so it makes a nice topping! *Great tip from Julie here! Bake brownie bars for about 25-30 minutes at 350 degrees until golden brown and done. Wait until they are cool and cut to enjoy!

I made mine with half white chocolate Easter candy eggs and dairy-free chocolate chips to make it allergen-friendly for our whole family.


What a yummy and easy treat! These blonde brownies remind me of soft and chewy chocolate chip cookies! Thanks Julie and your grandmother for such a wonderful recipe! 


Look at all of the amazing recipes for the April SRC post!

Wednesday, April 3, 2013

Old-Fashioned Chicken Legs

Yummy note: So I can't believe I haven't posted this before.. I double checked and was like what?! Seriously, no chicken leg recipes here... Interesting, that is not cool, as this meal is a staple for us and my kids LOVE it. Chicken legs are really so easy and it is a good starter for many other meals too. Think about how many times do you have a recipe calling for shredded or cooked diced chicken... chicken tacos, soup, pasta, etc.. So making extra chicken legs when you make this meal, is a perfect way to start those make-ahead leftover meals. These old-fashioned chicken legs, I call them this, as they are very basic, yet flavorful. I grew up with my family making them and having a wonderful gravy made from the drippings as well, served up with mashed potatoes, yum...  You can either make this chicken in the oven or even in a slow cooker if you'd like. When you make the chicken in the slow cooker it produces moist, fall off the bone tender chicken. However, be warned, the chicken will just fall right off the bone, sometimes making it hard to eat without getting too messy, so leave the slow cooker method for the chicken you want for shredding or to toss in other dishes. My favorite is to use my dutch oven and start it on the stove top and finish it in the oven. 


Old-Fashioned Chicken Legs


Ingredients:
6-8 chicken legs, thawed
1/2 cup of flour
salt/pepper
1 - 1 1/2 tsp of herbs & spices – paprika, garlic powder, onion powder, parsley, rosemary, thyme, or poultry seasonings

Directions:
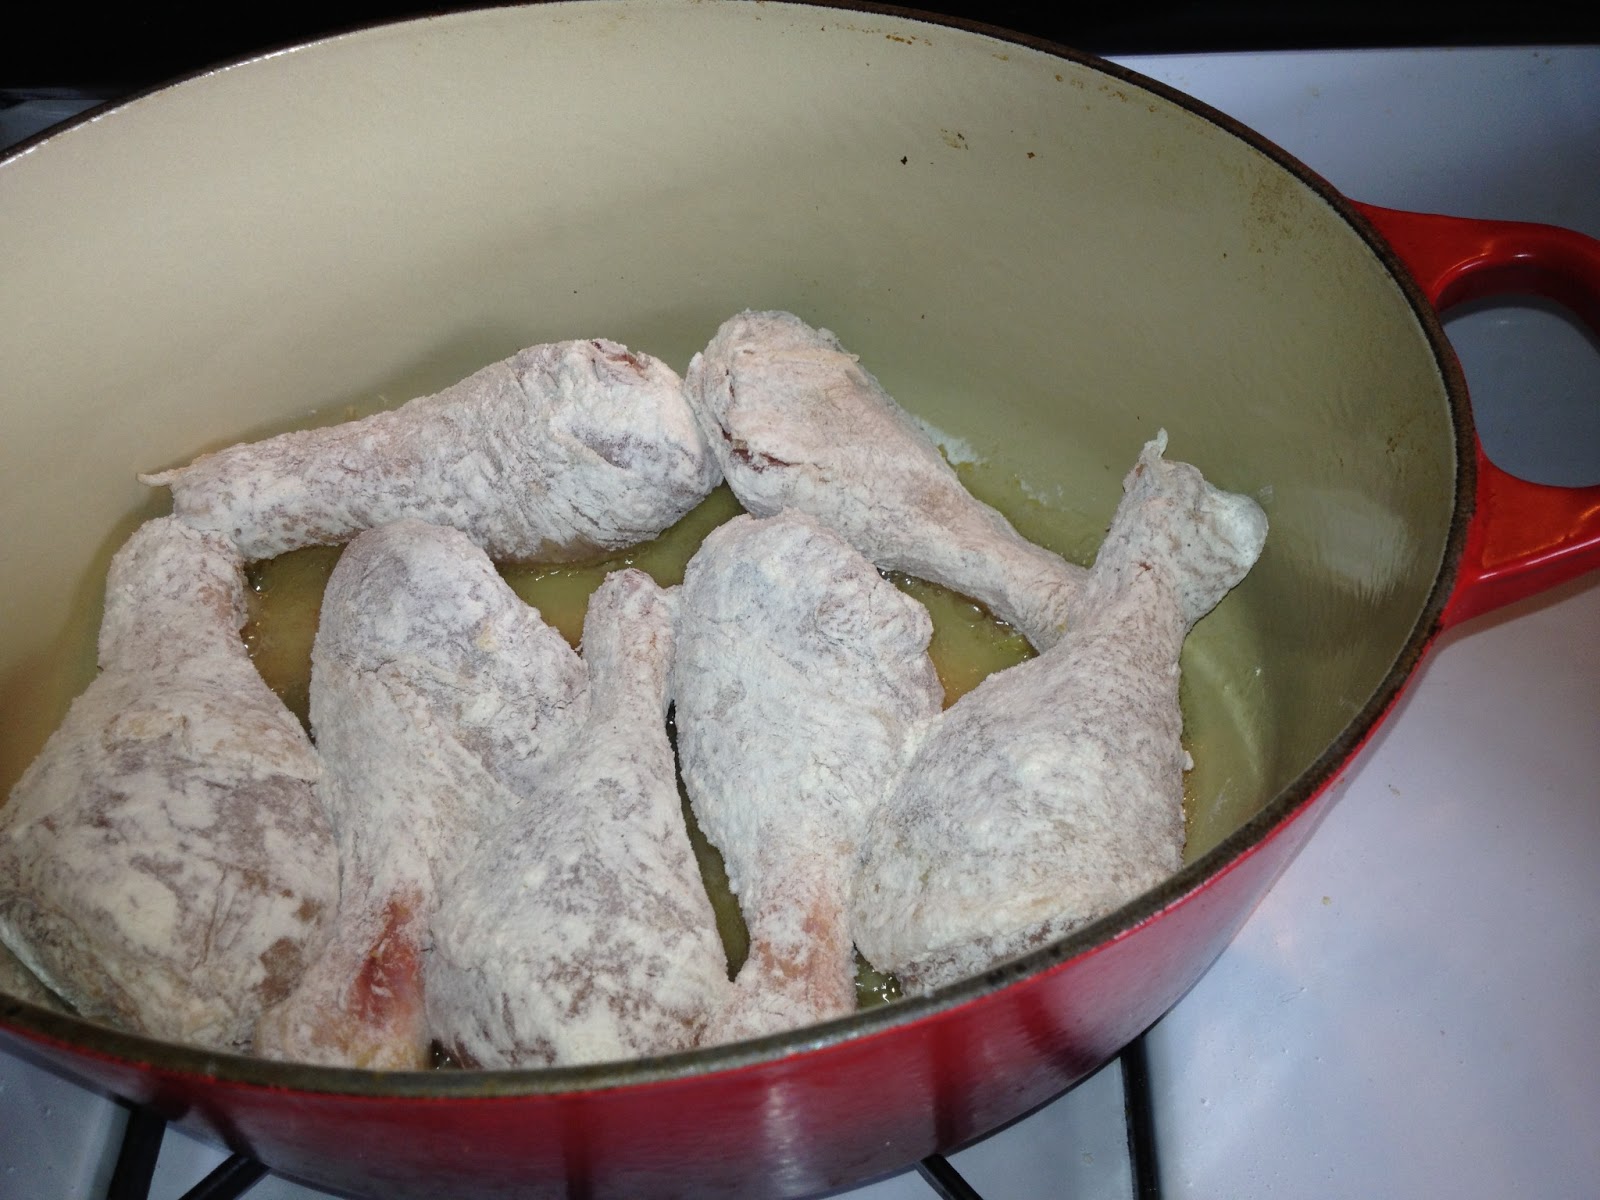
Coat chicken with herbs and spices. I never measure this, as it is just a sprinkle here, shake of this, and so on. I probably do about a teaspoon or so of the spices combined. Dredge chicken with flour and make sure it is coated. The next step is important as I think it adds to the appearance and makes the chicken less sticky and more held together at the end. In an oven-proof pan, such as a dutch oven pan,  drizzle a little bit of olive oil (over high heat on the stove) and lightly brown/sear the floured chicken pieces.


This should only take a few minutes, just enough to brown the skin a bit, basically just adding some color. Turn off the heat, and add in a few tablespoons of water or chicken broth just to deglaze the pan. Cover and place in a preheated 325 degree oven and bake for about 45 minutes. Depending on the size of the chicken legs, it could take closer to an hour to bake. Make sure they are fully cooked to the proper temperature of 165 degrees before enjoying.


Slow Cooker Variation:
Directions: 
Omit the flour. Place the seasoned chicken pieces and add 1 cup of water or chicken broth in the slow cooker. Cover and turn on low for about 5-6 hours or on high for for 3-4 hours. Check temperature of chicken to be about 165 to insure it is cooked well, as sometimes in the slow cooker, it is harder to tell if the chicken is done as it doesn't brown as much. You might notice the chicken will start to fall apart when fully cooked as well.