Monday, March 18, 2013

Hummus Bites

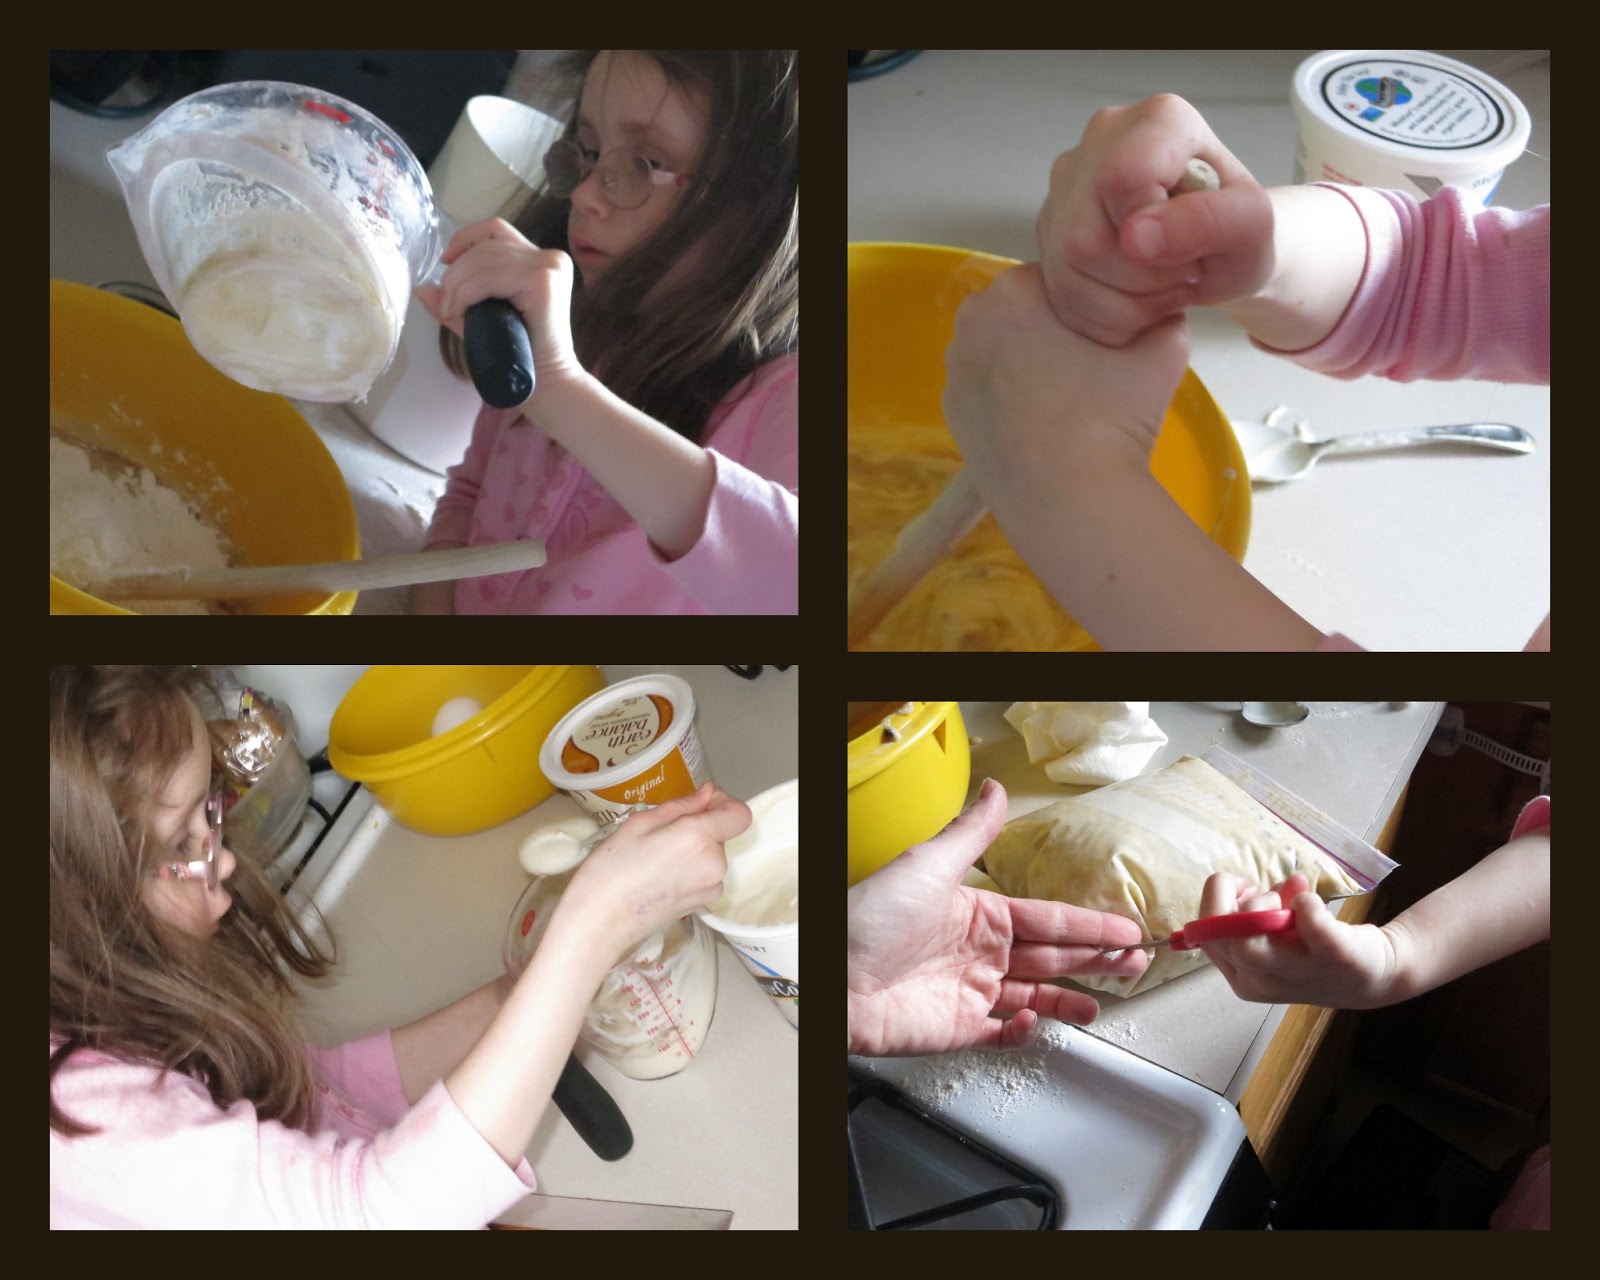
Yummy note: Surprise, surprise, it's Secret Recipe Club time! The March assignment brings me to A Couple in the Kitchen, a husband and wife team from Connecticut. Amy and Chris have been blogging strong for several years now. Their blog has been nominated for several awards and recipe recognition, so make sure to check out their list of accomplishments here. Let's start with a couple of my favorites: Sweet Chili and Coconut Corn Soup, oh, do I wish that I had some fresh sweet corn about now to make this soup; made using coconut milk, it is a perfect non-dairy soup to add to my recipe box. Another top choice that looked amazing on this cold, not quite spring day, is this Chocolate Stout Chili. Seriously, I bet the combination of flavors for the stout beer and spicy mole-like ingredients produce an amazing full flavored chili. However, I went with a different recipe to feature. You see, I had this poor little jar of tahini that has been sitting in my kitchen cabinet forever... Seriously, I've been meaning to try and make hummus with it since last summer... yeah, my horrible procrastination. My friend Mandi made amazing hummus at one of our kid's playdates and they loved it, our youngest boys were eating it with their fingers, it was that good. She kept telling me, it is soo easy to make, and I said, sure I'll buy the ingredients and try it one of these days. Haha, the can of chickpeas and tahini sat.. and sat; I never got around to making my hummus, until now. I was finally inspired by A Couple in the Kitchen's take on hummus and its fun presentation. The beautiful color and genius idea of serving hummus in these adorable little fillo cups - perfect for my kiddos hummus fix. LOVE it and I hope you do to. I totally see why it was used for a Halloween recipe, as the beautiful orange color of this hummus was amazing.


Hummus Bites

Recipe from
http://www.acoupleinthekitchen.us/2011/10/halloween-hummus-bites.html

Ingredients:
1 (16 ounce) can of chickpeas, drained and rinsed
1 lemon using about 3-4 tablespoons of lemon juice, to taste
1 1/2 tablespoons of tahini
1 tsp of prepared minced garlic or 2 cloves of garlic
1 teaspoon salt
1 (7-ounce) jar of roasted red peppers
2 tablespoons of olive oil
box of mini fillo shells
Optional: whole black olives, pitted


Directions:  
Combine the chickpeas, lemon juice, tahini, garlic, salt, and about 3/4 of the roasted red peppers in a blender or food processor. Pulse the ingredients for a few times and then add in the olive oil, about a teaspoon or so at a time. The mixture will begin to take on different textures, ranging from chunky to smooth, as the olive oil gets incorporated with the other ingredients. Continue pulsing the mixture until the hummus takes on the consistency you'd like. Refrigerate hummus until ready to serve. 


Fill the cute little fillo shells with the hummus and serve. 
Optional finishing touch- Check out A Couple in the Kitchen using the olives and leftover red pepper for a fun presentation.  

Other favorite hummus vehicles include pretzel chips or pita chips and carrots. 


Look at the difference between a homemade version and a store bought hummus. Such a beautiful orange color.  

Monday, February 25, 2013

Banana Bread Donuts


Yummy note: This is a perfect little breakfast, or snack day or night for us. It can be easily adapted to make dairy-free and nut-free which is so nice, as it is hard to find any commercially-prepared donuts that don't have dairy in them. My youngest loves these donuts, and my oldest really likes chocolate chip banana bread, so it was a nice compromise for the two. :) Not to mention, we like to always have these donuts in a hidden freezer stash for us to enjoy. It makes a perfect cold, frozen treat for those little ones when they are having a bad day, especially if they are teething and want something to chomp on that doesn't involve lots of sugar! Besides these donuts being wonderful right out of the freezer, they stay very moist for several days after baking them. My daughter helped me do a lot of the photos for this post, she is getting to be a pretty good little photographer for only 6 :)  Way to hold the camera and for having a good eye, Alicia. 


Banana Bread Donuts

I was inspired to make these by these two recipes:

http://itsyummytomytummy.blogspot.com/2010/04/banana-bread.html

Ingredients:

1 cup mashed bananas (about 3 small ones) (the browner the bananas the better)
1/2 cup sugar
1/2 cup yogurt (use a soy yogurt to make these dairy-free)
1/4 cup butter, melted (use a dairy-free alternative butter, or canola oil works) 
2 eggs
1 tsp vanilla
2 cups flour (use regular all-purpose and whole wheat flour)
1 tsp baking powder
1/2 tsp baking soda
1/4 tsp salt
1 cup chocolate chips, optional Note: Other optional ingredients is to add chopped nuts or even cinnamon chips to your batter before baking. Finishing ingredients: cinnamon/sugar for dusting, or a glaze using chocolate or vanilla frosting


My helper in the kitchen.. 


Directions:
Preheat oven to 325 degrees. Lightly grease/spray donut pans. In a mixing bowl, combine bananas, sugar, yogurt, vanilla, melted butter, and eggs. Next, pour in flour, baking powder, baking soda, and salt. Mix until the batter is incorporated. Add in optional chocolate chips or nuts at this point.
For ease of filling the donut pans, do yourself a favor and put the batter into a plastic baggie and cut the corner to eliminate lots of mess. Fill the donut pans about 1/2 to 3/4 full.
The pictures in this above collage were all taken by my 6 year old daughter, Alicia.  Note, I only had to recrop one of her pictures  above of the donut batter, the rest are Alicia's work!


Bake in the 325 degree oven for about 8-9 minutes for the small donuts, and about 10-11 minutes for the larger-sized donuts. Once donuts are done, cool them for a few minutes in the pan, but then remove them from the pan quickly before they get too hard to remove them. Toss with cinnamon/sugar coating or glaze with your choice of a simple frosting/glaze. This recipe makes atleast a dozen or so large donuts, plus a pan or so of little donuts. We like to use both sizes; the little donuts makes great little snacks for the kids.  


Monday, February 18, 2013

Avocado Cup Salad

Yummy note: I am so excited for this month's Secret Recipe Club, as it is my first month with a new to me group of bloggers. In the past year and a half or so, I have been blogging with a great, group B, but I thought a nice change up was in order with the new year. So I offered to switch it up and move to another group, and I got to move to group C. I thought this might be my chance to see some more great food bloggers out there better. I love seeing so many new sites for inspiration. So SRC group C friends, it looks like I am here to party with you now! 
For my first assignment with group C, I was assigned to The Ginger Snap Girl. Wow, what a great first impression of group C, as I just fell in love with Gloria's site. Gloria has such wonderful pictures on her site, that how can you resist not making a bunch of stuff from her blog as they all look so beautiful and tasty! She confesses that her favorite things to bake are cookies, and well, I can't disagree with that. Gloria has several chocolate chip cookies recipe variations on her site, that you must check out and see what kind of cookie fits your cup of tea. I love my cookies too, however, I am trying to eat a bit healthier. Shh.. don't tell anyone that I still love my desserts, and it seems I must eat something little and sweet after my evening meal or else I feel my day isn't complete. So fighting my urges to make these cookies, I went for the avocado cup salad; yes, I did it, I picked something lighter. :)  Oh, but it did not lack any flavor, as this salad was amazing; it had wonderful flavor, texture, and color. Definitely adding it to my rotation of salsas

Avocado Cup Salad
Ingredients:
1 teaspoon of olive oil1 cup of fresh or frozen sweet corn about a half of a pepper, diced (The Gingersnap Girl recommended using a red, yellow, or orange pepper, However, I used red and green peppers, diced, as that is what I had on hand.)
2 roma or plum tomatoes, cut in half, seeded and diced
1/4 cup of red onion, finely diced
2 teaspoons fresh cilantro (Adjust accordingly, from 1 teaspoon to 2 teaspoons to your liking.)
2 limes
1 small jicama, peeled and cut into thin strips (about 2 cups)
2 ripe avocados, peeled, pitted and sliced in half lengthwise
The original recipe called for these ingredients, which I did not use in my recipe. I didn't have them on hand, but I’m sure it would have added extra crunch and flavor! 
1/2 of a green chile or jalapeno, finely diced
2 green onions, thinly sliced
tortilla chips, broken into pieces


Directions: 
For the salsa part, heat a pan or skillet with a teaspoon or so of olive oil. Add in the frozen corn, peppers, and the optional chile. Saute for about 10 minutes or until veggies begin to get tender or begins to have a roasted appearance in the pan. Set aside in a small bowl to cool. Begin chopping the tomatoes, onion, and cilantro. Once the roasted corn, pepper, and chile mixture has cooled slightly, add in your chopped tomatoes, onion, and cilantro. Take the juice of one lime and pour over the salsa and stir.

Next, prepare the jicama slaw by peel the jicama and chopping it into thin sticks. Place the jicama in a bowl and toss in a pinch or so of chopped cilantro. Take the juice of your other lime and pour over the jicama and cilantro, and mix until nicely coated.


Prepare your avocados by slicing them in half, and then peeling and pitting them.

Assemble your plates starting with the jicama slaw on the bottom layer, with the half avocado next and then your beautiful salsa on top. Top each salad with a sprinkle of green onions and crushed tortilla chips. 


The Ginger Snap Girl said you can serve 4 side salads with this dish, but I liked it for a main meal dish, so I split it between 2 dishes. I served mine with a simple sauteed shrimp dish and it was a delicious pairing.


Monday, January 14, 2013

Soft Pretzels

Yummy note: As we welcome another new changing year, this type of blog feature with the Secret Recipe Club is one constant I enjoy looking forward to every month! We get assigned another fellow blogger's site, and then we get to pick a recipe from that blog and then reveal the results of our recipe assignment choice in a big blog party.  The Secret Recipe Club always seems to get a great turnout of amazing recipes and offers so many wonderful blog posts to read up on. This month I had the blog named OnTheMove-In the Galley. It is hosted by a lady named Dee. Dee is from Seattle and spends time traveling, cruising on her boat, and of course, blogging. She has several other blogs that keep her busy! You should check out her beautiful landscape and scenic photography skills on her other blogs - OnTheMove-at HomeOnTheMove-Cruise News, and OnTheMove-Road Trips.  This month's SRC choice, was really about what I had available in my pantry, freezer, etc., to try and use to make this dish feasible. It's been a rough month or so for our family with sicknesses, injuries, and normal holiday craze-daze, that I really wasn't in the mood to make something too crazy or out of the ordinary. Especially when I knew I had a high chance the kids were going to look at me weird and stick their noses up at.. soo... I opted for a comfort food to include them with. These golden brown soft pretzels fit the bill.  Mind you, I really really wanted to make this beautiful salmon and salsa dish, as I LOVE salmon, and but I didn't have any available, so, it is saved for another day. This recipe makes about 8 or so soft pretzels which is great, as it is a smaller batch and they can be gobbled up quick while they are hot and toasty, as we all know pretzels are the best that way.  :) 


Soft Pretzels

Ingredients: 

For the dough: 
2 ½ cups all-purpose flour
½ tsp salt
1 tsp sugar
1 package or 2 ¼ tsp regular instant yeast
1 cup water water 

For the pretzel bath/topping: 
½-1 cup warm water
2 tbsp baking soda
Coarse salt
3 tbsp butter, melted 


Directions:
In a large bowl, mix the flour, 1/2 tsp salt, sugar, yeast, and warm water together until well combined or the dough begins to look a little shaggy looking. Next, knead the dough for about 5 minutes or so until it is softer and gets less sticky. Basically you should be able to poke if with your finger and it shouldn't bounce back, and leave a small indent behind. Lightly flour dough and place it in a plastic bag to rest for about 30 minutes. Next prepare your baking sheets and preheat the oven to 500 degrees. I prepared my baking sheets just with some vegetable oil spray, as I was afraid the parchment paper route wouldn't hold up well in that hot of an oven… I've had an experience of two of burning the paper to a crisp, so I wasn't chancing it with these beauties, so I just make sure I sprayed a copious amount of the cooking spray on the pans.  

Preparing the pretzel dough.


After the dough rested for about 30 minutes, it should have had a nice rise to it. Now you can take it out and place on a floured area and cut the dough into about 8 pieces. The let the dough pieces again rest for about another 5 more minutes; this was hard, as the kids really wanted to get into making “snakes” with that dough!  While this is resting, mix the ½ cup warm water and baking soda in a shallow bowl, and mix well until the baking soda is completely dissolved. We had issues with this part, as I think perhaps the kids’ measurements were a bit off, so we modified this a bit. I ended up adding more hot water to the mixture to get the soda to completely dissolve, as it kept separating out on us and appeared to not dissolve all the way.  After your pretzel dip bath is ready, it’s time to start rolling! 
Alicia rolling out her "snakes."


Take each piece and begin to roll them out into the “snakes” as the kids instructed me.  J  They should be fairly long, so that you can then make shapes for your pretzels. We went a bit creative on a few shapes, and make alphabets, as it was a great learning tool with them. I love to incorporate any type of teaching and learning lessons when I have their attention like that in the kitchen.  After you have shaped your pretzel, dip them into that baking soda bath and place them on the prepared baking sheet. Sprinkle lightly with your coarse salt.  Dee suggested even sesame or other seeds might be delicious on them as well, and I agree; plus I think even a parmesan cheese or a little cinnamon/sugar mix might also be a nice treat too.  Again, let the shaped pretzels rest for another 10 minutes, uncovered, before you put them in the oven to bake. 

Getting ready to give the pretzel a bath. Ben still looks a bit skeptical of Alicia's "snake." 

Bake for about 7-9 minutes, depending on the shape of your pretzel, as some brown up faster than others, depending on the size. They should achieve a nice golden-brown color from the baking soda bath you dipped it into. Once the pretzels are removed from the oven brush them with some melted butter and enjoy while warm. Eat the pretzels warm, if you have any leftovers, just store them uncovered on plate or place in a paper bag and then rewarm them in the oven or microwave later. 
Success!  Golden brown soft pretzels proved to be a nice warm treat to the little tummies on a cold winter day. 

Stop by the other wonderful bloggers and visit their SRC selections for this month!

Wednesday, January 9, 2013

oatmeal drop cookies with the kids

Yummy note: It has been a crazy few weeks around our household with everything going on, but we still manage to find time to make some cookies. The kids and I tried out this oatmeal cookie recipe from an older Betty Crocker Cookbook I acquired a few years back. It is a pretty versatile recipe, as we swapped out the nuts for chocolate chips, and the kids aren't as fond of the raisins so we used more chocolate instead. Also we didn't have enough of the rolled oats, so we used a combination of mostly old-fashioned oats and some quick oats to make our version of these oatmeal drop cookies.


Oatmeal Drop Cookies 


Ingredients:
1/2 cup soft softening (we used Crisco)
1 1/4 cups sugar
2 eggs
6 tbsp molasses
1 3/4 cups sifted all purpose flour
1 tsp baking soda
1 tsp salt
1 tsp cinnamon
2 cups rolled oats (used combination of old-fashioned and quick oats)
1 1/2 cups chocolate chips


Original Cookbook below with recipe pictured above


Directions:
Preheat oven to 400 degrees. Mix together the soft shortening, sugar, eggs, and molasses until thoroughly mixed together. In a separate bowl, sift together the flour, salt, soda, and cinnamon. Add in the sifted ingredients to the above mixture. Last, add in your oats and chocolate chips until it is incorporated well. Then drop out cookie dough on to your lightly greased or prepared cooking sheet. Bake at 400 degrees for about 8-10 minutes until light brown.

My kitchen helpers and official taste testers...


Sunday, December 9, 2012

Asian Lettuce Wraps

Yummy note:  I have enjoyed an Asian flair lately in my cooking. Usually once a week now, in my meal plans I have started to incorporate an Asian night. I'm not sure if it is the easy to toss ingredients together to make something delicious, or if it is healthier, or perhaps it has to do with it is really easy to make dairy-free for my family. I find these Asian Lettuce Wraps great to make as a main meal dish. They are fairly quick to make and I often have almost all of the staple ingredients in my cabinet which makes for an affordable meal. I hope you enjoy these lettuce wraps as much as we do.


Lettuce Wraps


Ingredients:
a head of lettuce (or about 10 lettuce leafs)
1 lb ground turkey, beef, or chicken
a handful or about a cup of shredded carrots (optional)
about a cup of diced mushrooms
1/2 white onion-chopped (I often use dried onion flakes or powder if not available)
2 tbsp garlic minced
1 small can water chestnuts, chopped
1 tbsp red pepper flakes
1-2 tbsp soy sauce
1 tbsp vegetable or sesame oil
1/4 cup hoisin sauce
handful of thin sliced green onions, optional


Directions:  
Brown the meat. Then add in onion, garlic, shredded carrots, water chestnuts, soy sauce, vinegar, and red chili pepper flakes.  

After the carrots and mushrooms begin to soften, add in hoisin sauce, green onions, and extra oil if needed. Cook until mixed together and green onions begin to wilt, just for a few minutes really.

Serve in large lettuce leafs like a wrap or serve in a tortilla shell too if you wish. 
To garnish you can also add in fried thin rice noodles to the top. 

Monday, November 12, 2012

Chocolate Cupcakes

Yummy note: When I got this month's Secret Recipe Club assignment, I took a lot of time looking at Sarah's wonderful blog named Sarah's Kitchen.  Many of the recipes she posted are straightforward and pretty good-looking comfort foods that I could see eating night after night. I am sure her husband, Randal, that she blogs about quite frequently, really gets some great eats! Despite some wonderful main dish recipes that I've bookmarked, I keep seeing beautiful cupcakes... and well, more beautiful cupcakes taunting me.. Sarah, congrats, you had me at cupcake. It was like I shut my eyes, and saw these awesome pictures of cupcakes all lined up, with fluffy frosting, yummy and tasty looking. So enough of the gawking, I had to dive right in, and try it out myself. I really had a hard time picking, I really wanted to make these Salted Caramel Mocha brownie ones, but then I thought about these Caramel ones, and finally I came to a realization I can't eat all these cupcakes myself.... So in typical It's Yummy to My Tummy fashion, I got my non-dairy thinking cap on and decided to think rational and pick a cupcake recipe that had the best options to make dairy-free. These chocolate biscoff ones seemed appropriate  Plus, anytime I can use biscoff spread, count me in. 


Chocolate Cupcakes
Recipe with adaptions from: 
http://sarahsbritamericankitchen.blogspot.com/2012/05/chocolate-cupcakes-with-biscoff.html


Dairy-Free Chocolate Cupcakes 

Ingredients: 
3/4 cup plus 2 tbsp all-purpose flour
6 tbsp cocoa powder
1 tsp baking soda
1/2 tsp baking powder
1/2 tsp salt
1 cup sugar
1/4 cup vegetable oil
1 large egg
1/2 cup coffee
1/2 cup soy yogurt 
1 1/2 tsp vanilla extract


Directions: 
Combine the flour, cocoa powder, baking soda, baking powder, and salt and set aside. In a separate mixing bowl, cream sugar, vegetable oil, and egg until smooth, for just a few minutes. On low speed, blend in half of the dry ingredients until incorporated. Next, blend in the coffee, yogurt, and vanilla. Add in the remaining dry ingredients, and mix until just incorporated. Using an ice cream scoop, evenly distribute into cupcake wrappers. Bake at 350 for about 22-24 minutes. Makes 12 cupcakes. 


Biscoff Frosting

Ingredients:
1 cup butter substitute, softened
3/4 cup biscoff spread
1 tbsp vanilla extract
3 cups powdered sugar
3 tbsp soy milk or soy creamer


Directions:
Beat the butter substitute and biscoff spread until smooth.  Add the vanilla and powdered sugar and mix until combined.  Add in some soy milk and beat until it is creamy and combined well. 


To make some decorations, I just melted about a cup or so of non-dairy chocolate chips with a teaspoon of shortening together. Then I poured the melted chocolate into mini cookie cutters to set. Then you push out the chocolate when set and you have pretty cut-out chocolates to decorate cupcakes with. 


I need some serious help or therapy though... I couldn't stop at the Biscoff frosting. I had to indulge and make one of these Swiss Meringue Buttercream frostings I've read all about from Sarah. I've never made one like this before, so it was a bit intimating. Trust me, I wish I had a few pictures while making the frosting, but I was freaking out a bit too much. It was a bit more temperamental than I was ready for... but eventually got it to work. It took time for mine to "set up" as it looked all weird, soupy, and then curdled all in a matter of a few minutes, so as my mixer whirled the frosting together, I quickly sought out reinforcements and read up on Swiss meringue frosting.  Go ahead, some day when you are bored, Google it, and be educated about frosting. :) After my, mini freak outs, the frosting came together, and it was pretty and tasted smooth and silky buttery like Sarah frequently mentioned in several blog posts. It was now ready to decorate my moist chocolaty cupcakes!  Here's the link from the recipe I followed for the Swiss Meringue Frosting from Sarah's Kitchen- http://sarahsbritamericankitchen.blogspot.com/2011/12/snowflake-cupcakes.html


This cupcake recipe was so easy to make, that I don't know why you would want to use the boxed mixes, when you can get such great flavor and depth from this recipe! They were super moist and delicious. I will surely make these again. Thanks again Sarah for sharing your great recipes. 


For more information about the Secret Recipe Club, check it out --> http://secretrecipeclub.com