Tuesday, May 24, 2011

bacon and sun-dried tomato guacamole

Yummy note: So my inspiration for this recipe came from when I went to one of Rick Bayless' restaurants last year. The guacamole there was just so tasty, I wanted to make my own and find some good flavors. I didn't want just any imitation salty flavors, like when you often use one of those pre-packaged mixes you stir up with any ole avocado. So I found some guacamole recipes in the Fiesta at Rick's Cookbook http://www.rickbayless.com/cookbooks/fiestaatricks.html and decided to adapt them to a bit and make my own creation. This bacon and sun dried tomato guacamole is a mix of two of his recipes. I didn't have all the ingredients on hand for any of the recipes, so I made some variations, and it came together very nicely and quickly was able to make a delicious side dish.


Bacon and Sun-Dried Tomato Guacamole


Ingredients:
4-5 slices of bacon (about 1/2 cup or so crumbled up)
2 ripe avocados
1/2 medium onion, diced (about 1/4 cup diced)
1/4 cup of fire-roasted red bell peppers, chopped (can find these peppers already roasted and prepared in a jar)
1/3 cup soft sun-dried tomatoes, chopped
1/4 cup fresh cilantro, chopped
about 1/2 fresh lime


Directions:

Prepare bacon and cook to desired crispiness. Let bacon cool on paper towel (if you can handle just letting the bacon sit without eating it all :). When cool, crumble up bacon.


Cut open and prepare avocados by scooping out the avocado and place in a mixing bowl. I used a potato masher here and it worked beautifully to break up the avocados well.


Next, add in diced onion, cut up sun-dried tomatoes, cilantro, bacon crumbles, and red roasted peppers.


Add in the lime juice at the end and season with salt if needed. Cover guacamole with plastic wrap directly against the guacamole so that it does not turn brown as fast. Keep in refrigerator. Can garnish with extra cilantro and bacon when ready to serve.


Wednesday, May 18, 2011

beef meatballs

Yummy note: What I love about this recipe is that I can make it ahead of time and freeze it. Right after I had my little guy in February, my mom came in and helped me make a batch of these guys to keep in my freezer for those quicker no prep needed meals. With this recipe, you just pop the frozen meatballs into the oven or crockpot, pour on the sauce, and that's it. Just a little bit of prep time makes for an easy supper. You can eat these as they are, or a variation my daughter loves is to throw them on some type of bread and make a meatball sandwich! Another variation how we've used these meatballs is we have made them with a marinara sauce and served them with pasta. My family really loves this recipe, whenever we make it, there is rarely any leftovers since it is such a crow pleaser. I hope you enjoy it as much as our family does too.

Beef Meatballs


Ingredients:

3 lbs. ground beef
1 - 12oz. can of evaporated milk
1 cup oatmeal
1 cup cracker crumbs
2 eggs
1/2 cup chopped onions or substitute with some onion flakes if you don't care for lots of onions
1/2 tsp salt
1/2 tsp pepper

BBQ Sauce Recipe:

Combine 2 cups catsup, 1/2 tsp garlic powder, 1/2 cup chopped onions or onion flakes, dash of Worcestershire sauce, and 1 cup brown sugar in a sauce pan. Cook and stir until sugar is dissolved.

Directions:

Combine ingredients until well mixed.
Then roll mixture into balls. I used a cookie scooper to help maintain a constant size, which helps later when baking them. (This recipe makes anywhere from 60-80 meatballs, depending on size.)
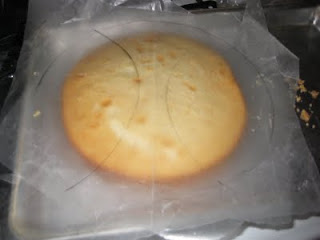
Place meatballs in a single layer on a cookie sheet lined with waxed or parchment paper. If you don't have those, aluminum foil works ok, too. Freeze meatballs until solid. Then refreeze meatballs until ready to use in either a storage container or freezer bags.
When ready to cook meatballs, place them in a 9 x 13 pan and pour over BBQ sauce.
Bake at 350 degree oven for about 1 hour, really depends on the size of your meatballs. You may also cook in a crock pot on high for about 2 hours and then on low for about 3 more hours.

Saturday, May 7, 2011

double chocolate brownie bites

Yummy note: The other night I was really hungry for some brownies, but we had no box mix in the cabinet, so I went searching in my cookbooks and came across this. I think it came out of an older Pillsbury or Betty Crocker cookbook. The beauty of this recipe is that I didn't have to wait for a whole pan of brownies to be finished. Instead in just a few minutes, I had warm yummy chocolate bites that reminded me of brownies.

Double Chocolate Brownie Bites


Ingredients:

1/2 cup brown sugar
1/4 cup butter, softened
1/2 tsp vanilla
1 egg
1 cup all-purpose flour
3 tablespoons unsweetened cocoa
1/2 tsp baking soda
1/8 salt
1/2 cup chocolate chips


Directions:
Heat oven to 375 degrees. Combine brown sugar and butter and beat until light and fluffy. Add vanilla and egg.


Next, mix in flour, cocoa, salt, and baking soda. Stir in chocolate chips until blended well.


Scoop dough out by teaspoonfuls onto an ungreased cookie sheet and bake for about 8 minutes in preheated 375 degree oven. Try not to overbake the cookies or else they will turn out very hard. For one of my batches of cookies I took them out even earlier than the 8 minute suggested time and got almost a more gooey-like fudgy brownie inside.

Thursday, April 28, 2011

Easy 1-2-3 Mexican shredded pork

Yummy note: This is a super easy and no real prep time involved recipe, which makes it awesome for those busy bees. What is perfect about this meal, it is easy to toss together before you run out and about all day. The spices and flavors that are already in the salsa makes the meat tender and flavorful, the perfect main course for any sandwich, taco, or add on top of rice/pasta. I've used this recipe with both chicken and pork, and have switched up the salsa flavors as well for some variations.

Easy 1-2-3 Mexican shredded pork


Ingredients:
1 jar of salsa (about 1 1/2 cups)
1 pork roast/shoulder (about 2-3 lbs)
1 small onion

Directions:
Open jar of salsa, and pour in about 1 1/2 cups of salsa of your choice into the crock pot. Add in one small sliced onion.


Place pork shoulder/pork roast (or any other meat of choice) in crock pot and cover meat with salsa mixture.


Cover and cook in crock pot on low setting for about 6 to 8 hours or until meat is tender and done. Shred meat and enjoy.

Thursday, April 21, 2011

bunny cake


Yummy note: I have to admit this is last year's bunny cake that I never blogged about! *gasp :O I know. but hey better late than never, right?! Plus it is just in time for you to make a cool Easter treat! Growing up, almost every year I think Grandma make us this cake. Grandma's cake was probably way cooler than mine will ever be, just because she had that special touch. I remember some years with coconut fur, another I think with pink frosting, jelly beans, and other cool goodness. Either way, have fun and make a cool bunny of your own. Here's our version.
Bunny Cake

Ingredients:
One cake mix and ingredients according to mix
1 can of frosting
candies to decorate (jelly beans, fruit snacks, chocolate, coconut, etc...)

Directions:
Make cake mix according to directions on box. Pour into 2 round cake pans to bake. Bake accordingly, probably about 27-35 minutes, depending on size of pans. Let cakes cool. Prepare sketch of bunny cake diagram shapes on waxed paper or freehand your cutting skills :) Cut the cake pieces as shown below.


Assemble the cake pieces on a board or tray.

Frost cake pieces. Then decorate to make a yummy funny bunny cake :)


Monday, April 18, 2011

spaghetti and meatball cupcakes

Yummy note: Recently, my little one went digging through my cookbooks and found probably one of my cutest books on the cookbook shelf, the "Hello Cupcake!" book. As she was rummaging through it a few caught her eye.. it was a toss up between the corn on the cob or the spaghetti and meatballs cupcakes. We decided on spaghetti and meatballs! These cute fun cupcakes were easy and quick to decorate, not to mention a good centerpiece with friends. Our version was modified a bit from the original, as the original recipe called for hazelnut chocolates (Ferrero Rochers) to be used for meatballs, but since my daughter is allergic to tree nuts, we had to find an alternative route. This is what the original in the book looked like. So we searched our pantry and found malted milk balls would work and give our "sauce" some texture. Plus she said "we can make just sauce with no meat on top." :) So that is what is great about decorating, you can do what you wish and have fun!

Spaghetti and Meatballs
Ingredients:
cake mix
vanilla frosting (I used this recipe http://itsyummytomytummy.blogspot.com/2010/05/buttercream-frosting-icing.html) or you can use a canned frosting as well
sprinkles/other candies for decorating
small plastic baggie
food coloring
1/2 - 1 tsp cocoa powder

Directions:
Prepare and bake cupcakes as directed on box.


Assemble cooled cupcakes on a serving plate, so that the sides touch each other. I did like a row of 4, then 5, and then 4 again. Make frosting as directed or have a can of vanilla frosting ready to prepare. Tint about half of your vanilla frosting by using a 1/2 teaspoon or so of cocoa powder and about 3 drops or so of yellow food coloring. Next spread a thin layer of frosting on the cupcakes. Put the remaining frosting in a plastic baggie and snip a tiny hole from the corner. About an 1/8 inch corner is good. Pipe the frosting all over the cupcakes, squeezing the bag slightly to create your "spaghetti" looking texture.


Next, take the other half of your frosting and tint it with red food coloring. Keep adding red food coloring drops until the color of sauce you'd like to achieve. I honestly do not recall how many drops we added, but make sure to stir the color in well so you can see your results. After coloring is achieved, you can add any candies you'd like to the "sauce" for texture or just spread it as is on top of your "spaghetti". Be careful to not let the spaghetti frosting set up/harden to quickly or else it may be more difficult to spread on the top layer of frosting without some cracking.

Once again, be creative and have fun!
Here's an ABC local news story link for original recipe and directions.

Tuesday, April 5, 2011

Pizza dough


Yummy note:
One thing we enjoy at our house is making homemade pizza. I've had a hard time in the past finding the right pizza dough recipe or prepared mix that we all really like. I don't mind investing some time in making the dough from scratch, as long as it is well worth it in the end. I think this recipe is pretty simple to make, it just takes a little rise time. What I like the best about this crust is that it turned out nice and chewy with a little crisp, rather than thin and soggy like some other homemade crusts. Hooray for Wolfgang Puck, this pizza dough is superb. This pizza dough recipe is from Wolfgang Puck's website here... http://www.wolfgangpuck.com/recipes/view/56793/All-Purpose-Pizza-Dough

Pizza Dough

Ingredients:

1 package of active dry or fresh yeast (roughly 2 1/4 tsp of yeast)
1 teaspoon of honey
1 cup of warm water (between 105 to 115 degrees F)
3 cups all-purpose flour (I used both whole wheat flour and white flour for this recipe and it worked well.)
1 teaspoon of kosher salt
1 tablespoon of extra-virgin olive oil, plus additional for brushing
Toppings of your choice to assemble pizza

Directions:

In a large bowl, dissolve the yeast in the warm water, along with the oil and honey at the same time. Add in the salt and gradually mix in the flour, one cup at a time. Mix together with a spoon until it is well combined and then knead the dough on a lightly floured surface for about 10 minutes. The dough should feel more smooth and firm.

Next, let the dough rise in a warm spot for about 30 minutes by place the dough in a lightly oiled bowl covered with plastic wrap.

Divide the dough into 4 sections. Take each section and form a smooth even ball of dough. You can do this by pulling and tucking the dough ball around. Then roll the ball in your hands until the dough feels smooth and firm, about 1 minute. Cover the dough balls with a damp towel and let rest 15 to 20 minutes. At this point, the dough balls can be wrapped in plastic and refrigerated for up to 2 days or used for pizza!

To prepare the dough for pizza, take each dough ball and roll/stretch it out on a lightly floured surface. You should get roughly a 7 to 8-inch circle pizza crust with the dough in this portion. It is perfect sized for more single serving pizzas. If you want a bigger pizza, adjust your dough ball sizes accordingly.

Then bake your prepared pizza in a 475-500 degree oven until done.