Pages

Thursday, March 29, 2012

chicken stock

Yummy note: I don't know what gets any better but some homemade loving chicken stock. It is like liquid gold. It warms a cold day, and fills your tummy and soul when you're sick or just need a warm comfy bowl of soup. I know, I can just buy a box at the store for a few bucks and not waste all my time doing this from scratch, but it isn't the same. Seriously.. When you cook a whole chicken, it really gets a bang out of your buck. You get a ton of meat, not to mention some great chicken stock to use for future meals. When I make a whole chicken, depending on its size, I can usually get a couple days of meals from it. Who doesn't love that? So I went looking in my cookbooks the other day for a chicken stock recipe, I came across this beauty here. How simple and delicious it is, and you often forget that the those are the things that make life better. It's not the crazy long list of ingredients, but instead the quality. I got this cookbook from someone at my workplace several years ago. It was sitting in the free pile someone brought in to give away, and of course I snatched it up, as I just love those old school traditional cookbooks. What a treasure find it was. I used the chicken stock recipe from this Betty Crocker Picture Cook Book here.


Chicken Stock 
recipe from the Betty Crocker's Picture Cook Book

my little treasure of a cookbook

Ingredients:
about a 4-5 lb whole chicken*
3 quarts cold water 
1/3 cup died carrots 
1/3 cup chopped celery 
1/3 cup chopped onion 
a tsp of so of parsley (original recipe said a sprig)
2 tsp salt  

*Honestly, the scariest part of this recipe is using a whole chicken if you have never done that before. If you are scared of that part, use the already prepared cut up whole chicken pieces. 


Directions:
Original recipe called to do this on the stove but I've done it in the crockpot several times too, it depends on your preference. For the stovetop, place whole chicken (or cut-up pieces) in a large pot and cover with the cold water. Bring to a boil slowly and then remove the foamy, scum like bubbles at the top. Then, add in the rest of the ingredients above, and gently simmer again for about 3 hours. Chicken should be falling apart by now and ready to remove and keep for future meals. Back to the stock, you need to strain your stock (using a cheesecloth or by other means). Discard the bones, fat, and the veggies, as the veggies are pretty blah if you were to taste one, as the flavor has cooked out into your stock instead. Next, chill the broth, and remove some of the fat and strain again.  If you are doing this in a crockpot instead, I will place the whole chicken into the crockpot, along with ALL of the other ingredients and cook on low for about 8-10 hours and follow stove top directions for straining and cooling as above. 

   
Such nice rewards for such a little effort. Seriously try it once and you'll be hooked. 

This broth makes a wonderful golden chicken and egg noodle soup.
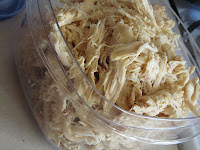
Look at all off the great cooked chicken to use for quick meals.

Friday, March 23, 2012

Pop-over for a cause

Yummy note: So every month, you know I participate in the Secret Recipe Club. What fun I've had in this club getting to virtually know and read about many great food bloggers out there. One of my blogger friends, Jey, from The Jey of Cooking is hosting a wonderful opportunity to help out right now. About a year ago, her mom received a life-saving heart transplant. Since then, Jey decided to post a heart-healthy recipe on her blog to honor her and invited her friends to join along. The awesome thing is that for every heart-healthy recipe that Jey receives she will make a donation to The American Heart Association. Yea! what a great cause to help out with, so if you want to join in, find out more details here. So, what did I decide to make... for awhile now I've been wanting to make popovers. I've always heard about them and never really made one before, so when I checked out one of the heart-healthy recipe links posted by Jey and I saw one and thought, yes! It looked super simple and perhaps easy to modify. Well, my modifications kinda went a bit off, but I can't wait to keep tinkering with this recipe and finding the best for our family's needs. I have been trying to switch and use more whole wheat flours in my recipes, so I did that, while I also made a soymilk modification as well, due to milk allergies. Also, I had a box of liquid egg whites in the fridge, so I used those in hopes of kicking up the healthier portion as well. :) It wasn't an exact "popover" like the massive puffy creme puffed looking things I'm familiar with, but it was still tasty.

Pop-over for a cause
Original recipe I modified from here - http://www.mayoclinic.com/health/healthy-recipes/NU00536

Ingredients:
1 cup soymilk
1 cup whole wheat flour
about 3/4 cup of liquid egg whites (or 4 egg whites)
non-stick cooking spray

Directions:
Preheat the oven to 425 degrees. Make sure you generously coat 6 muffin cup tins with cooking spray or else your popovers might get a bit stuck on. In a large bowl, whisk the egg whites and soymilk together.


Add in the flour and whisk until smooth. Fill the greased muffin tin about 2/3 full.

 Bake in the top part of the oven until golden brown and puffy. Peek in on your popovers after about 15 minutes, but don't open the oven door! It may take up to 20-30 minutes, depending on your oven and size of muffin tins. Once they are done, serve immediately and enjoy.

 
Yummy note:  So reflecting back on this... They didn't pop-up like I was hoping, nor was the texture up to my perfection. However, it did yield in a lighter biscuit like muffin that my younger kiddo loved. I thought it was good too, but not great. So I went researching it a bit, and saw that my egg whites and milk might have been better off at room temperature instead of directly out of the cold refrigerator. Also, perhaps heating up the pan in the oven before pouring the mixture into the cups would have been helpful too. Ah, oh well, I guess I will be testing this recipe even more.. If you have any suggestions, please let me know what might work with my recipe modifications. If you want the original list of ingredients, please check the original recipe.

Wednesday, March 14, 2012

Happy Pi (3.14) Day!


Yummy note: I should let my husband do the blog for this day since he's the big math whiz in the family, but I suppose I do a Pi(e) theme in my own way. Haha.. We celebrated 3.14 - Pi Day with a homemade layered pudding pie! I started with a handed down pudding recipe from my mom's mother, Alice. It originally had milk and eggs in this recipe, but I modified it a bit this time to see what would happen if I omitted the eggs, and changed the milk to a soy milk instead. The results were pretty good for a dairy-free and egg-less pudding. Yes, the texture was a bit off, as it was a tad spongy rather than silky smooth for a pudding, but it had a nice flavor. Not to mention it was allergy friendly for us. Next time I might add in the eggs back into the recipe, and see if that helps the texture and richness of the pudding. Here's the original pudding recipe I modified below if you'd like to make the pie this way as well.  


Happy ∏ Day


Egg and dairy-free pudding pie 

Ingredients:

Vanilla Pudding Layer:

about 8 teaspoons flour
about 12 teaspoons sugar (~1/4 cup)
dash of salt
1 cup of vanilla-flavored soy milk
additional 1 tsp vanilla to taste

Chocolate Pudding Layer:about 8 teaspoons flour
about 12 teaspoons sugar (~1/4 cup)
dash of salt
1 cup of chocolate-flavored soy milk

Graham Cracker Pie Crust:1 package graham crackers
1/4 cup sugar
1/3 cup softened (dairy-free) margarine substitute 


Directions:
In a food processor, crush one sleeve/package of graham crackers with the sugar. Add in softened margarine into the crumbs and pulse together until combined. Press crumbs into pie pan and pop into a preheated 400 degree oven and toast graham cracker crust for about 5 minutes or so, just until the crust starts to bind together. 


For the pudding, do each layer one at a time when you are ready, or else the pudding will set up before you are ready to pour it into the pie pan. Prepare your layers in the order you'd like. I did chocolate first, but it is up to you. 

Chocolate soy milk is my quick fix ingredient here, when I didn't have any chocolate to add in the pudding as the original recipe called for, I used chocolate milk instead! 


In a small sauce pan, add in flour, sugar, and salt. Add in soy milk and constantly whisk/stir mixture on low heat until it starts to get bubbly and thick. Remove from heat, and add in more vanilla extract flavoring if you need to the pudding. Pour the one pudding into the graham cracker crust, and begin next layer of pudding. Once you've repeated one of the batches of pudding, continue with the other and pour warm pudding on top of the other pudding layer slowly to avoid layers from mixing. Chill, slice and serve your pie! 


Happy Pi Day! 


How are you celebrating Pi day today?  :-) 
Maybe make a quiche, lemon tart, breakfast pie, or a pizza!  

Monday, March 12, 2012

one ingredient (banana) ice cream

Yummy note: Ice cream, without the cream, and it could be classified as dairy-free, vegan, and an allergen friendly ice cream? Seriously?? Yeah, no brainer... this one ingredient ice cream recipe from La Phemme Phoodie was it...I HAD to try it. Just like Wendy mentioned in her original post, I was also a bit doubtful this was going to work, until I got done with it. Since Wendy from La Phemme Phoodie also guest blogged about this recipe at All I Eat Food! -I knew it must be awesome. So without further intro, this month's Secret Recipe Club reveal is the one ingredient banana ice cream! Can I just state I was so excited about this recipe, especially since it was the first ice cream recipe I've ever posted on my blog too! I can't wait to start sharing it with my friends and hope that they get it enjoy it and have fun with this recipe as my family and I did. Really, you can go as basic as you want with this dessert (treat, breakfast, really, whatever you'd like to call it! haha) or jazz it up a bit with some mix-ins. Check out our variations below.. banana split ice cream, chocolate chip cookie sandwiches, strawberry banana, etc.etc. you can see how it rolls..

One Ingredient Ice Cream (Banana Ice Cream)

Ingredients:
Bananas (use atleast 2 or 3 for a small batch, if you are making a family-sized portion, I'd maybe freeze about 6 bananas)
*If you wish to jazz it up, have a few additional mix-ins such as vanilla extract, strawberries, chocolate, granola, etc. on hand.

I've got the bananas, mommy, let's make me some ice cream!! 

Directions:
Get a big bunch of bananas, make sure you have atleast 2-3 of them if making a small batch of the ice cream. If you have the freezer space, go ahead, peel, and cut up your bananas and place them on a baking pan as directed. Once they are completely frozen, pulse the chunks in a food processor for a bit until you get your soft serve looking ice cream treat!


Yummy note: If you don't have the room or space in your freezer, don't worry, freezing the bananas whole works well, too! 

I'll admit, I often have hiccups in the kitchen.. I'm mean cooking and baking is like one big experiment half the time, right? Well, my first pass at this recipe wasn't as successful, however it still tasted great, just not the texture I was looking for...So lesson learned-- be patient :)  I realized after I started pulsing the bananas that they were not as frozen as I had thought, so the kids and I got more of a banana pudding, than an ice cream.. haha. so I tossed the puree back into the freezer in a bowl and we got a hard set ice cream eventually.

So, yes, if you make a big batch of ice cream, you can refreeze it and save it for later and it still works fine.


I'm so excited I experimented with this ice cream recipe as my little guy can now enjoy a dairy-free ice cream treat! There's sure a lot of possibilities.. so try it out and you'll have to let me know what is your favorite way to make this banana ice cream treat.


I hope you enjoyed my Secret Recipe Club reveal this month and get a chance to explore all of the other great bloggers that join in the fun!

Wednesday, March 7, 2012

simple marinara sauce

Yummy note: This is a simple, yet very flavorful and versatile sauce, not to mention nice on the pocketbook! This has become one of my new standby recipes, as I love how it can easily be put together by using basic pantry items. I found this recipe on a fellow bloggers site called Jenna's Everything. Jenna's blog is a wonderful little find that has a bit of everything on it, a little cooking, some great photography, a handful of family stories, and not to mention she's in a band! What a great mix of everything, I knew I had to use this recipe now since she is a local Chicago gal. This simple tomato sauce fit perfectly for my best spaghetti and red sauce challenge for this month's Mom's Crazy Cooking Challenge.


Simple Marinara Sauce


Ingredients:
1/3 cup olive oil
1 onion (white or yellow)
couple of garlic cloves, diced
1 celery stalk, diced (I included the whole stalk, leaves and all)
1 carrot, diced
2 - 28 ounce can crushed or whole tomatoes
2 dried bay leaves
6 or so basil leaves, chopped
salt and pepper for seasoning
*optional add-in: diced peppers, or crushed red pepper flakes for additional flavor


Instructions:
Dice onion, garlic, celery, and carrot. In a large pan or dutch oven, saute all of the diced ingredients. 


Simmer on low to medium heat until veggies are soft and translucent. I added in just a shake or two of some additional Italian seasonings here too.  


Next, add in your canned tomatoes, basil and bay leaves. 


Break up the tomatoes a bit with a masher if you are using whole tomatoes. You can add in additional salt, pepper, or any other seasonings at this point. Note, depending on the flavor or brand of tomatoes you use, you might need to add in a teaspoon or so of sugar to cut through the acidity in the sauce. So just remember to taste it throughout the process and see how the flavor develops.   


Cover and simmer on low for atleast 45 minutes or so. The longer, the better really, as the flavor really starts to develop. Remember to discard the bay leaf before serving.


If you want a chunkier sauce, use a masher and break up the tomatoes and vegetables a bit more before serving, or pulse in a food processor or blender to achieve desired thickness. 


Serve with spaghetti, or your favorite pasta dish, vegetable, or even use some of the leftover marinara sauce for a pizza sauce too! Oh so yummy...


This is a great make ahead, marinara recipe that freezes well too. 


Check out the other great spaghetti and red sauce recipes here! 

Photobucket

Photobucket